Adobe Illustrator CS3 How to Use:
How to Use:
Adobe Illustrator CS3
Adobe Illustrator CS3 is a powerful software program used to make logos and sophisticated web
graphics with relative ease. Those who are familiar with other Adobe products, such as Adobe
Photoshop, should find learning Illustrator relatively simple. However, for those without extensive
Photoshop experience, the guide should provide a good introduction to navigating the basics of
Illustrator and set the groundwork for creating your own unique graphics.
Adobe Illustrator is such a complex program that much of what it has to offer is not included in
these basic quick tips. Feel free to explore new tools and processes.
If you have any questions, feel free to ask a TLC staff consultant during staffed hours at your center.
In this tutorial, learn how to:
•
•
•
•
•
•
•
Begin from scratch or work on a pre-designed template
Draw and paint
Use ruler guides
Adding Text, Shapes, and Symbols
Change color, font, and design schemes
Resize, move, align, nudge, and delete objects
Resize and position objects with precision
Updated by Lyndsey Thompson (February 2008)
Quick Tips for Using Adobe Illustrator CS3
CONTENTS
Opening Illustrator ...................................................................................................... 3 Tools............................................................................................................................. 4 Draw/Paint..................................................................................................................... 5 Adding Color ................................................................................................................. 6 Using Ruler Guides ....................................................................................................... 6 Adding Text ................................................................................................................... 7 Rotating Objects............................................................................................................ 7 Adding and Working with Symbols................................................................................ 7 Adding Shapes .............................................................................................................. 8 Saving Your Work ....................................................................................................... 11 Printing ........................................................................................................................ 11 Further Information...................................................................................................... 11 COPYRIGHTS
"Screen shot(s) reprinted by permission from Adobe Corporation. Adobe is a
registered trademark of the Adobe Corporation. Windows is a trademark of
Microsoft Corporation.”
2
Quick Tips for Using Adobe Illustrator CS3
To open Illustrator click on the Start button, go to Programs, and up to Adobe Illustrator CS3. On
OPENING
opening,
the program will bring up a dialog box asking if you would like to create a new Print
ILLUSTRATOR
Document, Web Document, Mobile and Devices Document and so on. From here you can also
open a previous or existing project, or used pre-designed templates. This window also provides
links to Getting Started, New Features, and Resources. You can always get back to this screen by
going to Help, then Welcome Screen. For right now, select Print Document. A new window will
open in which you can name your project, and change several other options regarding layout and
format. It is alright if you don’t name your project now. Click OK when you are finished selecting
the options.
You should now see a blank workspace. Take a look at the terms used to describe the different
panels and menus.
Control Panel
Menu Bar
Three Pallette
Panel
Tools Panel
In this quicktip, we will be creating a poster to advertise a fish sale at a pet store. It will be helpful
to you by learning the different tools and what you can do with them so that you can apply it to
projects of your own.
3
Quick Tips for Using Adobe Illustrator CS3
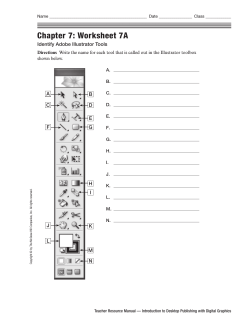
TOOLS
This is a description of the Illustrator tools. We won’t be using all of them in our tutorial but feel free
to explore further. The tools we are going to mostly work with are found in bold.
4
Quick Tips for Using Adobe Illustrator CS3
DRAW/PAINT
You can use the pencil or paintbrush tool to draw a picture, after you have drawn it, you can use a
process called “Live Paint” which we will also explore. Lets begin by drawing a fish. Illustrator will
“stylize” what you draw or paint to make the lines smoother and less rigid.
You can select a color other than black to draw or paint with by selecting a color from the Control
Panel. It is the drop down menu found farthest to the left and most likely has a red slash through it.
This will allow you to use different colors to draw and paint with. In the Control Panel you can also
select different sizes and shapes for your tools.
If you do not see your Three Palette Panel, look for a double arrow in the upper right hand corner
(see where the arrow is pointing above). If you do not have an arrow, go to the Menu Bar, select
Window, and then you can choose the palettes you want, for this quicktip, you will need the Color,
Symbol, and Appearance palettes shown.
5
Quick Tips for Using Adobe Illustrator CS3
ADDING
COLOR
To add color to the drawing, we must first select the parts we want to color. To do this, use the
Selection tool. By clicking and dragging we can select more than one object at a time. After you
have selected the fish and the bubbles, select the Live Paint Bucket Tool. You can find it in the
Tools Panel or by pressing ‘K’ on the keyboard.*
You can then select a color from the Control Panel, it will be the first drop down on the left, and will
probably begin as a red slash. After you have selected a color, you can color your fish almost as if
you were coloring in a coloring book.
*At some point Illustrator may give you a message that says the complex visual appearance
attributes may be lost when converting to a Live Paint group, select OK.
USING RULER
GUIDES
To use the ruler guides*, go to the Menu Bar and select View and then Show Ruler. You can also
press Ctrl+R on the keyboard. To take the rulers off go to View and then Hide Ruler, or press
Ctrl+R.
*Note: The ruler guides may not automatically be set in inches. To change this, go to the Menu
Bar, File, Preferences, Units and Display Performance, and then change the General setting to
Inches.
6
Quick Tips for Using Adobe Illustrator CS3
ADDING TEXT
To add text, select the Text tool from the Tools Panel. Click and drag to create a text box in which
to type in. You can change the font, orientation, and size in the Control Panel. Use the Three
Pallette Panel to change the color.
If later you want to change what you have written, simply double click on it and it will bring up the
editing tools again.
ROTATING
OBJECTS
At any time, you can rotate objects by simply selecting them using the Selection tool (V), and just
as if you were resizing a window, place the cursor over the corner of the selected area, an arrow
will appear which allows you to increase or decrease the size of the selected object, moving a little
farther out from the corner, a half circle double arrow will appear, and you can rotate your object as
far as you would like.
ADDING AND
WORKING
WITH
SYMBOLS
To spray on symbols using a spray can, select the Symbol Sprayer tool (Shift + S). In the Three
Pallette Panel there will be a tab labeled Symbols. Click on it. To open symbols, go to the bottom
left hand corner of that panel, the first icon is the symbol library (See Below). By clicking on it, you
can view many categories of symbols such as Flowers, Mad Science, Nature, and Tiki. By
selecting a category, a new window will open. For example the Nature menu brings up the
following:
7
Quick Tips for Using Adobe Illustrator CS3
Symbol Library Button
You can select any of these to add to your document by clicking on them. After you have selected
it, you are now able to spray however many of the symbols you want.
Just like in Photoshop or Paint, you can resize the symbol by selecting it, placing the cursor on the
corner and adjusting it to be smaller or larger. Anytime an object is selected, you can nudge it
around by using the arrows, or by moving it with the mouse, and you can rotate it using the cursor
as well.
ADDING
SHAPES
If you don’t feel like drawing freehand, Illustrator has some shapes that you can utilize. By using
the shape tool. It is shaped like a rectangle in the Tools Panel. By clicking and holding, it will also
drop down rounded rectangle,elipse, polygon, star, and flare.
8
Quick Tips for Using Adobe Illustrator CS3
Let’s work with the rectangle, you add it just like adding an object in Photoshop or Paint, by
clicking and dragging. The color selection is in the Control Panel, the first color is the inside fill, and
the second is the border color. Let’s make a box with a blue border and no fill.
These are the color selection boxes
found in the Control Panel
We can increase the size of the border by changing the size in the Control Panel. This can be
found right next to the color options.
If you want to add more than one identical shape, you can click once where you want to place it
and then click OK and Illustrator will automatically copy your shape and paste it for you. By
changing the information in the box that pops up you can adjust the siz e of the object.
Lets go back and use the Live Paint tool to make our fish blend in a little bit with the others. And
rearrange the objects so that they will fit better on paper. Remember, you can select anything by
simply clicking on it with the Selection Tool (V). And finally, lets add more text to advertise the
location of the pet store using the text tool again.
9
Quick Tips for Using Adobe Illustrator CS3
A FEW COOL
TOOLS
One tool that can create some really amazing designs is the Crystallize Tool. It can be found
underneath the Warp Tool. Lets use the shape tool to add a star off to the side of our poster. Now,
select the Crystallize Tool. Make sure the star is selected and then by clicking on the star you can
see that it will swirl and wiggle about. By clicking and holding you can make the frequency of the
squiggles increase. Another similar tool is the Twirl Tool, it is found in the same menu as the
Crystallize Tool, and automatically swirls objects around to create a really neat effect.
Now lets color it blue by selecting the colors in the Control Panel, and move it over to the poster
side of our document. I am going to copy and paste multiples of this to create a background that
looks like waves. To send it behind the text, right click and select Arrange, then Send to Back. It
is still difficult to read the text, so lets go to the Control Panel and change the opacity to say 30
percent. This will tone down the color and make it appear almost as a watermark behind the text.
10
Quick Tips for Using Adobe Illustrator CS3
To remove the part of the object that has gone beyond the boundaries of the document, select the
eraser tool and simply erase!
SAVING YOUR
WORK
PRINTING
To save, go to the Menu Bar, to File, Save As…
You can now decide what to name your file, and also what format you will save it as such as ai
(Adobe Illustrator file), or PDF. A selection window may pop up requiring you to OK the save.
Make sure you have selected the format you want to save it in, and select Save.
If you want to print your document, go to File, Print or (Ctrl + P). The window that opens allows
you to move your file around to center it on the paper. This is a handy way to make sure nothing
will be cut off during printing. You can also resize the entire file to encompass the entire page.
Many of the tools and effects work the same since both Photoshop and Illustrator are made by
FURTHER
INFORMATION Adobe. Check out the TLC’s Photoshop CS3 Quicktiphttp://tlc.housing.wisc.edu/docs/quicktip_photoshop.pdf
11
© Copyright 2025
