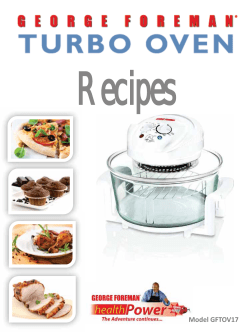
AeroMatic Convection Oven Instruction Manual & Recipe Guide
AeroMaticTM Convection Oven
Instruction Manual &
Recipe Guide
AST-900E
Congratulations on your purchase of the
AeroMaticTM Oven. It will
surely become one of the most useful and versatile appliances in your modern
kitchen.
Please read all instructions before your first use.
Published By:
Aroma Housewares Co.
6469 Flanders Drive
San Diego, CA 92121
U.S.A.
1-800-276-6286
www.aromaco.com
© 2004 Aroma Housewares Company. All rights reserved.
IMPORTANT SAFEGUARDS
Basic safety precautions should always be followed when using electrical appliances,
including the following:
1. Important: Read all instructions carefully before first use.
2. Do not touch hot surfaces. Use handles or knobs.
3. To protect against electrical shock, do not immerse cord, plug or the appliance itself
in water or any other liquid.
4. Close supervision is necessary when the appliance is used by or near children. This
appliance is not intended to be used by children.
5. Unplug from outlet when not in use and before cleaning. Allow unit to cool before
putting on or taking off parts, and before cleaning the appliance.
6. Do not operate any appliance with a damaged cord or plug or after the appliance
malfunctions or has been damaged in any manner. Return appliance to the nearest
authorized service facility for examination, repair or adjustment.
7. Do not use attachments or accessories other than those supplied or recommended
by the manufacturer. Incompatible parts create a hazard and may cause injury.
8. Do not use outdoors.
9. Do not let cord hang over edge of table or counter, or touch hot surfaces.
10. Do not place on or near a gas or electric burner or in a heated oven.
11. Do not use the appliance for other than intended use.
12. Always unplug from the base of the wall outlet. Never pull on the cord.
13. Extreme caution should be exercised when using or moving the appliance
containing hot oil or other hot liquids.
14. The oven should be operated on a separate electrical circuit from other operating
appliances. If the electric circuit is overloaded with other appliances, this appliance
may not operate properly.
15. Store in a cool, dry place.
16. To disconnect, move the handle up to OFF position then unplug the oven from the
electric outlet.
17. When moving and setting the top unit down, always rest it on the metal rack.
18. Do not place the oven too close to the edge of the table or countertop as the oven
might be knocked off.
19. The glass cooking bowl and other parts become very hot. Be sure to use the
handles and wear protective oven mitts or gloves.
20. Do not use the glass cooking bowl for other purposes.
21. Wait until glass cooking bowl and top unit have completely cooled before moving or
cleaning.
22. Do not use this appliance as a fryer. Do not fill with oil or attempt to deep fry. Such
actions may cause fire and injury.
SAVE THESE INSTRUCTIONS
1
SHORT CORD INSTRUCTIONS
1. A short power-supply cord is provided to reduce risk resulting from entanglement or
tripping over a longer cord.
2. Longer extension cords are available and may be used if care is exercised.
3. If a longer extension cord is used:
a. The marked electrical rating of the extension cord should be at least as great as
the electrical rating of the appliance.
b. The longer cord should be arranged so that it will not drape over the counter top or
tabletop where it can be pulled by children or tripped over unintentionally.
POLARIZED PLUG
This appliance has a polarized plug (one blade is wider than the other); follow the
instructions below:
To reduce the risk of electric shock, this plug is intended to fit into a polarized outlet only
one way. If the plug does not fit fully into the outlet, reverse the plug. If it still does not fit,
contact a qualified electrician. Do not attempt to modify the plug in any way.
This appliance is for household use only.
2
PARTS IDENTIFICATION
High Rack(2):
for browning food and
as a stand for the hot
lid after cooking
Low Rack:
for cooking food
Steam Rack:
for small foods
1
2
9
10
5
6
Handle up: Power off
8
3
4
Handle down: Power on
7
11
1.
2.
3.
4.
5.
6.
Power control switch
Oven/ lid top
Power indicator light
Timer
Oven body
Tempered glass lid
7. Glass cooking bowl
8. Handle
9. Temperature control switch
10. Temperature indicator light
11. Steel stand
3
Before First Use:
1.
2.
3.
4.
5.
6.
6.
7.
Ø
Ø
HOW TO USE
Read all instructions and important safeguards.
Remove all packaging materials and make sure items are received in good condition.
Tear up all plastic bags as they can pose a risk to children.
Wash the glass cooking bowl in warm, soapy water. Rinse and dry thoroughly.
Place oven on a dry, level countertop or table. Keep the edge of the oven 2-4
inches away from any walls and objects on the countertop or table.
Place the lid securely on the unit.
Set the timer for 5 minutes and preheat the oven to maximum temperature.
After the timer has turned off and the oven has cooled, wipe the inside of the glass
bowl again.
Do not use abrasive cleaners or scouring pads.
Do not immerse the lid, cord or plug in water at anytime.
To Use:
1. Place the low rack in the glass container and put food on the center of the rack. Allow
a 3 inch space between food and top of oven. You may use the high rack for
achieving crispiness or browning of food. The other high rack is provided to support
the oven top/ lid unit after cooking.
2. Place the oven top unit on the glass container securely.
3. Insert the power cord into the proper electrical outlet.
4. To turn oven on, push the handle down until it securely snaps into place. If the handle
is not down securely, the power will not turn on.
5. Set the timer to the desired time. The power light will illuminate.
6. Turn the temperature switch to the desired temperature. The temperature light will
illuminate and cooking will begin. A blinking temperature light indicates temperature is
being adjusted automatically.
7. When the cooking time has elapsed, the oven will turn off automatically. To ensure
safety, when the handle is lifted up, the power will turn off automatically. To turn the
power back on, push the handle down.
Note:
• During the first use, you may detect the scent of lubricant coming from the top unit.
The odor is not harmful to you or the appliance and will disappear after
approximately 10 minutes of use.
• Wooden, heat proof plastic, and nylon utensils are recommended for use with this
AeroMaticTM Oven. Metal utensils may scratch the glass.
4
HOW TO CLEAN
Always unplug unit and allow to cool completely before cleaning.
1. Turn the oven OFF by turning the timer to zero (0) and unplugging the power cord
from the wall immediately after cooking. Allow oven to cool completely.
2. Wait until the glass cooking bowl is completely cool and then clean it thoroughly with
warm, soapy water and a damp sponge or cloth. Glass cooking bowl and accessories
are dishwasher safe. For tough cleaning jobs, pour 1/2 inch of water and some
detergent into the glass cooking bowl. Replace the oven top/ lid and set thermostat to
200°F. Set the timer to 15 minutes and watch as the turbo action softens and
removes residue. Unplug and allow to cool before finishing cleaning.
3. The grease filter is located on the underside of the oven top/lid. It can be removed
and soaked if needed in hot detergent to remove grease. To remove the the grease
filter from inside the top oven unit, unscrew the 3 connector screws (see image
below). This should be done only when the unit is unplugged and completely cool.
Ø Do not use abrasive cleaners on oven or glass cooking bowl.
Ø Do not wash or immerse the oven top/ lid, cord or plug in water or any other
liquid.
Ø The oven top/ lid is NOT immersible or dishwasher safe.
Grease Filter
Located on the underside of the oven top/lid
Screws
5
Filter
AEROMATIC OVEN COOKING
What is an AeroMatic™ Oven?
The Aroma AeroMatic™ Convection Oven is part of a revolutionary new cooking trend.
More and more, people are moving away from traditional bulky appliances in favor of
portable, multiple-function devices like the AeroMatic™ Oven. The AeroMatic™ Oven
bakes, steams, broils, grills, roasts and even 'air' fries to lock in the true flavor of food.
This device is so compact, it can easily be used in dorm rooms, at tailgate parties, in
RVs, on coffee tables or even in the office. In addition to being lightweight and
portable, the AeroMatic™ Oven from Aroma cooks food faster than traditional ovens
while using less energy! Its tempered-glass body allows you to watch as the
convection action of the AeroMatic™ Oven cooks your meal to perfection. A built-in
timer helps assure this cooking perfection and reduces the possibility of burning food.
How does it operate?
All you need to cook the AeroMatic™ way is an electrical outlet and a flat surface, safe
for cooking. The AeroMatic™ Oven consists of a heating element, an exhaust fan and
a built-in grease filter. The real magic in cooking with the AeroMatic™ Oven comes
from the rotating hot air that circulates around the food. As long as the food placed on
the cooking rack has empty space around it, it will cook uniformly. When using the
food rack, it is important to leave space between the food and the heating unit.
To cook properly, the oven top (lid) must be set on the glass cooking bowl so that it sits
evenly and securely. This conserves heat and provides correct convection airflow. If
the top is not placed upon the glass bowl correctly, cooking time will be extended and
the lid will vibrate.
What Methods of Cooking can be used with the AeroMatic™ Oven?
The AeroMatic™ Oven bakes, steams, broils, grills, roasts, toasts and even 'air' fries. It
will even thaw frozen foods.
6
BAKING & STEAMING COOKING TIPS
TURBO-BAKING & TURBO-STEAMING
• Be sure containers fit the diameter of the glass pot. Usually, a tube or bunt-cake pan
is better to use than larger cake pans. Disposable aluminum foil mini-loaf pans also
work well as they cook faster and more evenly. Muffin-welled pans for cupcakes or
individual muffins (4 to 6 wells) are excellent in small batches. Preheating is not
necessary for turbo-baking.
• For uncovered dishes, the cooking temperature is from 25 to 50°F lower for turbobaking in your AeroMaticTM Oven and there is no need to preheat.
• Use the clear glass bowl to monitor the food and be sure to record the actual
cooking time for future use.
TIME (min)
TEMPERATURE °F
Biscuits
10 min
400
Cake (layer)
20 min
300
Cake (loaf)
35 min
300
Cookies
8 min
325
Brownies
20 min
300
Pie Crust (with filling)
10 min
400
Pizza
12 min
400
Bread (rolls)
15 min
350
Bread (loaf pan)
30 min
325
Muffins
15 min
350
FOOD
This chart is for reference only. Time may vary according to size or
depth of mixture, composition of ingredients and desired crispness.
7
BAKING & STEAMING RECIPES
Meat Loaf With Bacon Topping
2 lbs. of lean ground beef
2 fresh eggs
2 tsp. of garlic salt
1 small can of tomato paste (6 oz)
1 cup of uncooked oats (or 1 cup of bread crumbs)
fi cup of catsup
fi cup of chopped white onions (or 2 tbsp. of dry minced onions)
1 tsp. of black pepper
1 tbsp. of sugar
1 tbsp. of soy sauce or Worcestershire sauce
Several strips of bacon for topping
Mix all ingredients together, except the bacon slices. Grease loaf pan and pack in meat
mixture fl high. Top with bacon slices. Turbo-bake, using the low rack, at 350°F for 1 hour.
Cooking time may be reduced if baking two smaller pans instead of one large one.
Let brown then turn over once to brown the other side.
Baked Clams or Bay Mussels
20 fresh large clams or bay mussels, removed from shell
2 tbsp. of lemon juice
⁄ cup of chopped onions
fi tsp. of black pepper
Garlic salt to taste
Arrange clams or mussels in baking dish/pan, preferably tempered glassware. Mix
together black pepper, lemon juice, garlic salt and chopped onions. Distribute on top of
each shellfish evenly and bake, using low rack, at 300°F for about 8 minutes. Larger
pieces may need about 10 minutes to cook.
Whole Steamed Fish
Any fleshy white fish such as red snapper, flounder, or mullet
fi cup of water
2 tsp. of lemon juice
Salt and pepper to taste
Be sure fish is free of any lose scales. Season all surfaces of the fish with salt, pepper
and lemon juice. Pour water in the glass bowl. Form a baking pan for the fish out of foil.
Wrap fish well with the foil and steam at 350°F for 10 to 20 minutes, depending on the
size of the fish. Arrange steamed fish on an oval platter with lettuce as bedding.
8
BAKING & STEAMING RECIPES
Indonesian Beef
1 fi lbs. of lean beef sirloin (boneless)
1 clove of minced garlic
1 fi tbsp. of soy sauce
1 tbsp. of vegetable oil
fi tsp. of cumin
fi tsp. of coriander
fi tbsp. of salt
Skewers
Cut beef into 3/4”-1” cubes. In a mixing bowl, combine garlic, soy sauce, oil, cumin and
coriander. Add beef and stir to coat. Refrigerate for one hour, then remove meat from
marinade. Spread 4-6 pieces of meat on each skewer. Arrange skewers on rack and grill
for 8-10 minutes at 400°F.
Lemon Squares Or Bars
1 stick of butter (fi cup)
1 cup of sugar
1/4 cup of powdered sugar
1 tsp. of grated lemon peel
2 large eggs
1 1/4 cups of flour
3 tbsp. of lemon juice
1 tsp. of baking powder
Cream the butter and powdered sugar until fluffy. Add half of the flour and beat well.
Spread mixture on well-greased, shallow cake pan and turbo-bake, using the low rack, at
350°F, for 10 minutes or until nicely brown. Mix remaining flour and baking powder. Beat
eggs until light and add the granulated white sugar. Continue to beat; add lemon juice
and peels alternately with the remaining flour and baking powder mix. Pour the lemon
mixture over the baked crust. Continue to bake for 15 minutes or until done (slightly
moist, not dry). Remove from oven and sprinkle with powdered sugar. Cool before
cutting into squares (or rectangular bars).
Breaded Baked Pork Chops
Rub surfaces of pork chops with salt and pepper. After an hour, dip in beaten egg-milk
mixture and roll in bread crumbs. Arrange in a single layer on a greased shallow pan or
on a shaped heavy aluminum foil. Set on the low rack and turbo-bake at 400°F for 15
minutes or until nicely brown. Turn over once to brown the other side.
9
BROILING & GRILLING RECIPES
TURBO-BROILING & TURBO-GRILLING
• Place food directly on the grill or rack without covering. Use the high rack to bring
food closer to the source of heated air. The idea is to sear the surfaces and seal in
the juices as quickly as possible.
• If the meat or fish is very lean, brush the grill or rack with cooking oil before arranging
the meat/fish on the grill.
• For glazing affect, set the food about 4 inches away from the top heating unit. Apply
the desired glaze and broil (400 to 475 °F) until the desired shade of brown is
reached. Fruit jams, preserves, and jellies work well as a glaze for broiled or roasted
meat.
Turbo-Grilled Prime Rib
6 lbs. of prime rib, cut into individual ribs
1/3 cup of Dijon mustard
2 tbsp. of red wine vinegar
⁄ cup of olive oil
1 clove of garlic (minced)
fi tsp. of Worcestershire sauce
⁄ tsp. of ground pepper
Arrange ribs in a large shallow pan. Mix the rest of the ingredients in a small bowl and
pour over ribs. Coat evenly. Cover and let stand for about fi hour. Lift prime rib bones
from marinade. Arrange on rack and turbo-grill for 10-15 minutes at 400°F.
Broiled Eggplant
1 eggplant, split lengthwise
Wash eggplant and puncture skin with table fork around surface about 6 to 8 times. Broil,
using the low rack, at 475°F for 15 minutes, turning once after 6 to 7 minutes.
Turbo-broiled eggplant retains nutrients and juice while cooking evenly. The skin is
easily peeled and the pulp is not discolored.
10
BROILING & GRILLING RECIPES
Grilled Fish with Miso (Japanese Gyoden)
1 whole mackerel
3 tsp. of miso
2 tsp. of water
2 tsp. of sugar
2 tsp. of Mirin* wine
Cut mackerel into 1” thick pieces. Mix miso with water and remaining ingredients to
become miso paste.
Turbo-grill the mackerel pieces at 350°F for 5 minutes. Spread miso paste on both sides
of mackerel. Cook for another 4 to 6 minutes.
*Mirin wine is a sweet Japanese rice wine. It can be substituted with same amount of
sugar and sherry.
Pepper Steak
4 steaks (New York or T-bone)
1/4 tsp. of dry basil
2 tbsp. of ground pepper
1/4 tsp. of garlic salt
Sprinkle pepper over both sides of each steak; press into the surface. Sprinkle with basil
and garlic salt. Let stand at room temperature for 20 minutes. Place steak on rack and
grill for 8 to 10 minutes at 400°F.
Garlic New York Strip
4 lbs. trimmed New York strip (boneless loin)
2 cloves of minced garlic
Ground pepper to taste
Combine garlic and pepper; rub over both sides of steak. Cover and let stand at room
temperature for fi hour. Place beef on rack and turbo-bake for 10-12 minutes at 400°F.
11
BROILING & GRILLING RECIPES
Turbo-Grilled Pork (Venezuelan Style)
4 lbs. of boneless pork roast
1 large chopped onion
2 cloves of garlic
1 can (4oz.) of drained pimentos
1/4 tsp. of pepper
1/4 cup of vegetable oil
fi cup of white vinegar
1/3 cup of chopped parsley
In a bowl, mix together all ingredients. Pour mixture over the meat. Keep at room
temperature for fi hour. Place meat on rack and turbo-bake at 425°F for 10 to 12 minutes
or until well done.
Broiled Portuguese Lamb
6 lamb shoulder chops
1 cup of dry red wine
1/4 cup of vegetable oil
1/4 cup of red wine vinegar
2 cloves of minced garlic
fi tsp. of salt
fi cup of chopped onion
1 tbsp. of whole mixed pickling spice
4 whole cloves
1/4 tsp. of ground cloves
Place lamb in shallow pan. Mix rest of the ingredients in a bowl and pour over pork
chops. Keep in refrigerator for 4 hours or over night.
Place pork chops on rack and turbo-grill for 10 to 12 minutes at 400°F.
Grilled Bacon Slices
Arrange in a single layer directly on the mesh pan (labeled “steam rack” on page 3. Broil
at 475°F until the desired crispiness is reached.
12
TURBO-ROASTING
ROASTING TIPS
• Roasting is a dry-heat method of cooking large pieces of meat uncovered on a rack,
with or without a supporting pan. When cooking, be sure that the roast does not
touch the lid or metal fan guard attached to the inside of the lid.
• Line the bottom of the glass pot with aluminum foil to catch drippings and juices.
• It is recommended that you use the low rack when roasting.
• There is no need to preheat, baste or turn.
• A meat thermometer is recommended. Roasting time varies with type of meat, type
of cut, and the amount of fat and tenderness according to age or maturity of animal.
The thickness and weight of each piece also has to be considered.
• A longer cooking time is required for frozen or partially thawed meats.
• If meat is lean, spray the rack and the side of the glass with a nonstick vegetable oil.
In the absence of meat thermometer, use the following table as a guide:
For the following meats, set temperature to 400°F.
TIME (min)
TEMPERATURE °F
Beef (rib, rump, chuck)
10 min
400
Beef (boneless)
20 min
300
Pork (picnic)
35 min
300
Pork (boneless)
8 min
325
Pork (pork loin with bone)
20 min
300
Pork (ribs)
10 min
400
Ham (bone, fully cooked)
12 min
400
MEAT
This chart is for reference only. Time may vary according to size or
depth of mixture, composition of ingredients and desired crispness.
13
ROASTING RECIPES
Whole Roast
Place the whole piece of meat directly on the low rack, with the fatty portion facing the
top. Rub seasoning all over the surface as desired. Insert meat thermometer into the
middle thick part without hitting bone. The temperature for turbo-roasting is generally
50°F less than in a regular oven or conventional roasting. The juices are sealed in and
there is no need to baste. Cooking time depends on the type of roast and size.
Roasted Whole Chicken
Wash the chicken inside and out and rub it with any desired spices or condiments. Let
seasonings penetrate the chicken for a few hours (preferably overnight in the
refrigerator) before roasting. Line the bottom of the glass bowl with aluminum foil to
catch drippings. Roast at 400°F for about 10 minutes per lb. For a crispy skin, increase
the temperature to broil, 475°F, for an additional 5-10 minutes.
Stuffed Whole Chicken
Clean a 5 lb. chicken and pat dry before seasoning. Stuff with desired mixture and rub
outside with your favorite spices. Roast with breast part up on low rack without a pan.
Cook at 400°F for 15 minutes per pound to ensure that stuffing is done.
Roast Cornish Hens
With this smaller poultry, 3 whole pieces can be roasted directly, seated on the low rack.
Season as desired and roast for 25-30 minutes at 375°F.
Gourmet Stuffed Cornish Hen
Follow above Cornish hen recipe. Before roasting, stuff Cornish hen with rice and
stuffing recipe below:
1 cup of rice
2 tsp. of butter
1 tsp. of garlic salt
1/8 tsp. of black pepper
fi cup of white or sherry wine
1 cup of water
Diced chestnuts or almonds
Minced onions
Celery
On the stove, fry rice in butter until golden brown. Add onions, garlic salt and black
pepper.
Add chestnuts or almonds, celery and wine, then, add water and let simmer for 30
minutes or until the rice is tender, but not overcooked.
Stuff the hen and bake for 20-25 minutes at 375°F.
14
AIR-FRYING RECIPES & COOKING TIPS
TURBO-AIR FRYING- A healthier way of frying!
• Little or no oil is used, yet the effect is like pan-frying or deep-frying. If oil is used,
only a thin layer of oil should be evenly distributed on the food with the aid of a pastry
brush.
• Once the oven has finished frying, remove the oven top/lid at once and remove the
cooked food to cool. This will ensure that food crisps up faster. If you let the oven
to/lid on the cooking bowl, the steam will cause the food to become soggy instead of
crispy.
• Use a rack to allow free circulation of hot air. Spray the rack with a nonstick vegetable
oil to facilitate removal of cooked food.
• NEVER FILL THE GLASS COOKING BOWL WITH OIL. THIS APPLIANCE IS NOT
INTENDED TO BE USED AS A DEEP FRYER.
French Fries
Spread a single layer of frozen French fries straight from the package on steam basket.
Brush with canola oil if needed. Turbo-fry at 400°F for 10 to 12 minutes.
Southern Fried Chicken
Cut whole chicken into quarters. Marinate in 1 cup of milk, 1 tsp. garlic salt and black
pepper for 15 minutes. Shake in a plastic or brown paper bag with 1 cup of flour and
fi tsp. of paprika, covering chicken liberally with mixture. Roll flour-covered chicken in
poly-unsaturated oil and bake at 300°F for 20 minutes and at 475°F for 5 to 10 minutes
or until golden brown.
TURBO-COOKING FROZEN FOOD
Another advantage of the AeroMaticTM Oven is its ability to cook frozen foods without
having to defrost them first. Just allow a longer cooking time, depending on size and
shape of the food, added ingredients, etc.
Frozen Pizza
Be sure the diameter of the pizza is no more than about 10 inches making sure that it
fits into the glass bowl. Bake it on the low rack, on a pizza pan at 450°F for 8 to 10
minutes. Place it on the rack without a pan for a crispier crust.
TURBO-TOASTING & WARMING
With the AeroMaticTM Oven, save time and energy toasting bagels, croissants, bread
slices, french rolls and more. Place bread on low rack and set temperature to 200°F.
Toast until desired darkness is achieved.
15
LIMITED WARRANTY
Aroma Housewares Company warrants this product free from defects in material and
workmanship for one year from provable date of purchase in continental United States.
Within this warranty period, Aroma Housewares Company will repair or replace, at its
option, defective parts at no charge, provided the product is returned, freight prepaid with
proof of purchase and U.S. $8.00 for shipping and handling charges payable to Aroma
Housewares Company. Before returning an item, please call the toll free number below
for a return authorization number. Allow 2-4 weeks for return shipping.
This warranty does not cover improper installation, misuse, abuse or neglect on the part
of the owner. Warranty is also invalid in any case that the product is taken apart or
serviced by an unauthorized service station.
This warranty gives you specific legal rights which may vary from state to state and does
not cover areas outside the United States.
AROMA HOUSEWARES COMPANY
6469 Flanders Drive
San Diego, California 92121
1-800-276-6286
M-F, 8:30 AM - 5:00 PM, Pacific Time
Website: www.aromaco.com
FOR ORDERING PARTS OR IF YOU HAVE ANY COMMENTS
ABOUT THIS PRODUCT, PLEASE CONTACT AROMA
CUSTOMER SERVICE DEPARTMENT AT 1-800-276-6286.
16
© Copyright 2025

