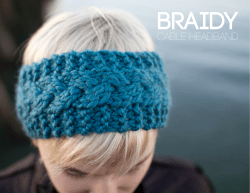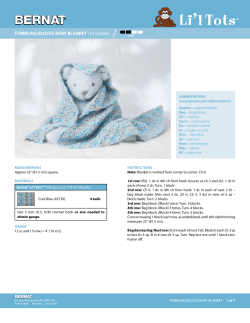
Headband Pattern , c .
Headband Pattern
Pattern by Tiffany Matthews, converted to loom knitting by Isela Phelps.
Headband Pattern
Pattern by Tiffany Matthews. Converted to loom knitting by Isela Phelps with
permission from Tiffany Matthews.
Yarn: Worsted Weight yarn. Sample was worked with Cascade 220 Superwash
Wool in Gray.
Loom: Small gauge knitting loom with at least 33 pegs.
Directions
CO 9 sts
Row 1 (Going from right to left on your knitting loom): k1, *p1, k1; rep from * to
end of row.
Row 2 (Go from left to right on the loom): k1, *p1, k1; rep from * to end of row.
Row 3: Repeat row 1
Row 4: Repeat row 2
Begin the increases:
Row 5: k1, p1, k1, p1, kf&b, p1, k1, p1, k1 (10 sts)
Row 6: k1, p1, k1, p1, k2, p1, k1, p1, k1 (two knit stitches are at the center of the
row. You will increase BETWEEN these two knit stitches on the next row.)
Row 7: k1, p1, k1, p1, k1, m1b, k1, p1, k1, p1, k1 (11 sts)
Row 8: Work in the rib pattern across all the stitches, knit the knit stitches, purl
the purl stitches.
Row 9: k1, p1, k1, p1, k1, pfb, k1, p1, k1, p1, k1 (12 sts)
Row 10: k1, p1, k1, p1, k1, p2, k1, p1, k1, p1, k1 (again, you will have two purl
stitches next to each other right at the center of the row, you will increase
BETWEEN these two stitches on the next row)
Row 11: k1, p1, k1, p1, k1, p1, m1f, p1, k1, p1, k1, p1, k1 (13 st)
Row 12: Work in the rib pattern across all the stitches
Continue to increase in this manner until your work measures 7” from the cast on
edge. You should have 33 stitches on the needle.
Work in the rib pattern for another 4” (until you have 11” from the cast on edge—
this is the place where you work less rows to make a smaller or longer
headband)
Begin the decrease:
Row 1: [K1, P1] 7x, K1, P3tog, K1, [P1, K1] 7x (31 sts)
Row 2-4: Work in the rib pattern across all the stitches
Row 5: [K1, P1] 7x, K3tog, [P1, K1] 7x (29 sts)
Row 6-8: Work in the rib pattern across all the stitches
Pattern by Tiffany Matthews, converted to loom knitting by Isela Phelps.
Continue to decrease in this manner—every other row that goes from right to left,
k3tog or p3tog the two very center stitches, with the rest of the stitches being
worked in rib stitch (knitting the knits purling the purls)--until you have 9 stitches
remaining on the loom. Last 4 rows: work in rib stitch as established. Remove
from the loom using the Basic Bind Off method leave the last stitch on the peg.
Transfer the last stitch to a crochet hook. Chain 4-6 stitches and connect them to
the beginning of the BO edge (this makes the button loop so size it according to
the size of your button).
*You may continue doing a decorative crochet edging. Single crochet around the
entire headband edge. The entire crochet border is optional. It gives the edge a
bit of a decorative look. But the headband looks fine without it. If you choose not
to do it.
To make the headband wider, cast on extra stitches. To make it longer, add extra
rows at the center.
Needle Knit Pattern can be found at this link:
http://tmatthewsfineart.blogspot.com/2011/11/free-knitting-pattern-headbandear_23.html
Loom Knit Pattern can be found at this link at knittingboard.com blog chat. Isela’s
blog can be found at purlingsprite.com
Video links on doing the headband on the loom can be found at the knittingboard
blog chat above.
Flower instructions: I followed this YouTube video link by EpicAbundance.
Pattern by Tiffany Matthews, converted to loom knitting by Isela Phelps.
© Copyright 2025


