
Online Quilt Magazine 4 Easy Steps To The Perfect
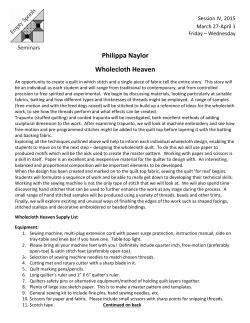
Online Quilt Magazine – Vol. 2 No. 5
Online Quilt Magazine
4 Easy Steps
To The Perfect
Scrappy Quilt
.com
Discover the
Secrets
Behind Giving
Your Projects
The Aged
Antique Look
BONUS PROJECT –
Balkan Puzzle Quilt
What’s New From The
Fat Quarter Shop
How To
Spoil A
Good
Quilt
Class…
© Online Quilt Magazine.com All Rights Reserved P a g e | 1
Vol.2 No.5 – May 2011
Online Quilt Magazine – Vol. 2 No. 5
Online Quilt Magazine Table of Contents
What Is Quilting? ……………………………….……………………………………………………………………………………….Page 4
Secrets Behind Giving Your Sewing Projects the Aged Antique Look …………………………………………..Page 7
Designing Quilts Using Traditional Quilt Blocks …………………………………………………………………………..Page 9
Hints And Tips From Brannie ………………………………………………………………………………………………………Page 11
Scrap Quilt Patterns – 4 Easy Steps To The Perfect Scrappy Quilt ……………………………………………….Page 13
BONUS PROJECT – Balkan Puzzle or Windblown Star Quilt …………………………………………………………Page 16
How To Spoil A Good Quilt Class …………………………………………………………………………………………………Page 20
What’s New From The Fat Quarter Shop …………………………………………………………………………………….Page 22
Africa American Quilting History 101 ………………………………………………………………………………………….Page 26
RECIPE – 5 Minute Chocolate Mug Cake ……………………………………………………………………………………..Page 30
BLOCK OF THE MONTH – Modern Milky Way Block.........................................................................Page 31
Today's Tips......................................................................................................................................Page 33
Quilters' Horoscope..........................................................................................................................Page 34
YES – We Want To hear From You....................................................................................................Page 35
Cover Photo courtesy of www.QuiltBlockoftheMonthClub.com
© Online Quilt Magazine.com All Rights Reserved P a g e | 2
Online Quilt Magazine – Vol. 2 No. 5
Letter from the Editor
Jody Anderson
Hi!
Welcome to our May Issue, in what’s shaping up to be another month of changes and new things. The
weather’s changing - crazy storms and tornadoes in the US for Spring, and Autumn here is getting colder now…
I’m in the process of moving offices (always fun!) and am currently working between two separate places, so
please do forgive me for a rather late release of this new issue.
The rather exciting ‘new’ things we have, are a couple of Brand New Quilt Pattern Sets on CD-Rom. Mum and I
have been working on these for the last 12 months and we’re really proud that these new designs are finally
done and ready to share with you. You’ll find a quick mention of these on Page 29, or on our other website
www.Quilts-n-bags.com .
More new things to share are the articles in this month’s issue. We have another great quilt project from Rose,
and a really interesting article from Julie on making a scrappy quilt so that the colours work together, rather
than just looking like a bit of a confused mess… Check out Annette’s story on How to Spoil A Good Quilt Class
too – this was sent in by a Reader who’s actually experienced most of these (and we’re sure that many of you
have some of these too!) Enjoy!
Take care, and have a great month,
Jody
© Online Quilt Magazine.com All Rights Reserved P a g e | 3
Online Quilt Magazine – Vol. 2 No. 5
What is Quilting?
By Bev McClune
Take a journey into the world of patchwork and
quilting and you will discover that quilters have a
language of their own. Unfamiliar “lingo”
encountered when learning about quilting, can be
very baffling.
Even the word quilt has different meanings. It
refers to a coverlet made up of three layers and
the act of stitching the three layers together (as
in quilt a quilt). Now for some inexplicable reason
the word quilter refers to a person who makes
quilts even if they don't necessarily know how to
quilt them. You could be an expert quilter and
still not be capable of quilting a quilt, as your
expertise might lie in one of the many ways to
create a quilt top.
Even though quilting is sometimes used as a short
form of "patchwork and quilting" (as in saying
you are taking up quilting when you are learning
how to piece patchwork), in the dictionary you
will find that there are two different meanings for
quilting. Quilting is the stitching that holds all
three layers of a quilt together and it is also the
act of creating those stitches.
Here are some more terms that you will come
across when learning about machine quilting.
1. In the Ditch is quilting very close to the
low side of the seam line, to be almost
invisible. The low side is the side without
the seam allowance.
2. Outline quilting is stitching done inside
each patch about ¼" away from the seam
line or stitching around a shape as in Echo
quilting. Sometimes confused with
© Online Quilt Magazine.com All Rights Reserved P a g e | 4
Online Quilt Magazine – Vol. 2 No. 5
stitching in the ditch, in outline quilting
the stitching is supposed to be visible.
3. Motif quilting creates a design by
following a pattern on the quilt top. There
are various marking tools and numerous
techniques for marking the pattern onto
the quilt top.
4. Accent quilting is stitching that
complements the featured design.
Stippling the background around the
design is a type of accent quilting, as are
Echo quilting and Meandering.
Learn all of the tips, tricks and shortcuts
of cutting fabric and sewing blocks in
this easy-to-read guide.
5. Selective quilting is used to emphasize
certain portions of a design.
6. Allover ( or Edge to Edge) quilting ignores
the seam lines and fills the entire quilt top
with a design.
7. Trapunto is a "fattening up" of areas of a
quilt design to create brilliant texture.
Trapunto is most effective when the
A Beginner's Guide to
Quilting
Unlock the Secrets of creating a
beautiful quilt using this simple 9 step
system. Amaze your friends with your
creativity.
www.How-to-Quilt.com/beginners.php
© Online Quilt Magazine.com All Rights Reserved P a g e | 5
Online Quilt Magazine – Vol. 2 No. 5
background quilting around the "fattened
up" area is densely quilted. It makes the
plumped areas stand out more.
8. Quilt As You Go means that you quilt and
piece all your blocks separately. The
smaller pieces are quilted separately and
then joined together to make a large quilt.
It is easier to manage and quilt a smaller
piece under the sewing machine instead
of a huge quilt.
9. Free Motion Machine Quilting is a form of
quilting done by the quilter without
marking the quilt. You just sit down with
the quilt under the machine and "doodle"
away!
10. Fill quilting fills in and flattens the
background space while emphasizing the
primary design. Types of fill quilting are:
•
Echo - Stitching around the outline of a
pattern repeatedly to create an effect
similar to ripples in a pond.
•
Channel - straight, parallel lines of
stitching.
•
Crosshatching - straight line quilting in a
grid pattern. A straight grid forms squares,
while a diagonal grid forms diamonds.
•
Meandering - random curved lines,
squiggles and swirls done "freehand".
•
Stippling - is similar to meandering but
the line never cross.
About the Author:
Since discovering quilting ten years ago Bev McClune has
become an award winning domestic machine quilter, a
professional machine quilter and a popular tutor. She has
four how-to quilt DVD's available at
http://www.quiltersworld.com.au
© Online Quilt Magazine.com All Rights Reserved P a g e | 6
Online Quilt Magazine – Vol. 2 No. 5
Secrets Behind Giving Your Sewing Projects
the Aged Antique Look
By Lenna Green
Giving your fabric an aged or antique look is very
easy. One method is to use tea to dye your fabric.
You can tea dye the fabric before using it or after
depending on its end use. If I was making a
sewing bag for example, I would dye the fabric
before using it.
If I wanted to embroider on the fabric I would
choose to tea dye it after working on it simply
because it is much easier to transfer the pattern
prior to darkening the fabric.
If you choose to tea dye the fabric after
embroidering on it, be aware that the dye can
affect the colour of the embroidery threads used
and can sometimes shrink the fabric as well.
To dye fabric with tea place some tea bags in a
glass bowl and then fill with boiling water. Add a
teaspoon of salt to help set the dye. The number
of tea bags will determine the strength of the tea
dye solution.
As a guide use approximately 4 tea bags for a
weak solution. Let the solution cool slightly. Wet
the fabric to be dyed with warm water. Squeeze
out the excess and then place into the tea
solution. If you want an even dye remove the tea
bags. Leave for a few hours stirring occasionally
to ensure the tea dye is being taken up evenly.
Alternatively leave the bags in the solution for a
more uneven result. Remove the fabric from the
tea solution and squeeze out the excess water.
Remember the colour will be lighter when the
fabric dries.
© Online Quilt Magazine.com All Rights Reserved P a g e | 7
Online Quilt Magazine – Vol. 2 No. 5
Another method is to put some strong tea in a
spray bottle and spray the fabric until you get the
desired effect. Or you can dab the fabric with the
warm tea bags to give a more dappled result.
Examples of this technique can be viewed by
following the Stitchingcow link below.
Another method used to age fabric is to use
Parisian essence (found in the cooking section of
the supermarket). Parisian essence is used in
cooking for browning gravies, soups, broths,
cakes and puddings. The same technique
described above can be used for aging your fabric
with this solution. Simply substitute the tea bags
with a 1-2 teaspoons of Parisian essence. Coffee
can also be used as an alternative substitute,
although is a more expensive choice.
Once your fabric is dry and you are happy with
the aged look press with a hot iron. If you are
unhappy with the result simply repeat the
process again to darken further, or soak in a
solution colourfast stain remover such as
nappysan to bring the fabric back to its original
condition.
Dyeing fabric with tea, coffee or Parisian essence
can give your projects a unique aged feel to
them.
Copy and paste the following link into your
browser to receive a free redwork pattern that
has been given the tea dye look...this one’s on us!
http://www.stitchingcow.com/freebies/freeredwork-pattern
About the Author:
If you experiment with each of these methods
you will find that they all dye the fabric a
different shade. Tea will give a more yellow
brown colour whilst Parisian essence and coffee
give a deeper brown shade.
Lenna Green is a textile designer who has been teaching
patchwork, quilting, applique and hand embroidery for the
past ten years. Her website http://www.stitchingcow.com
is a visual feast for sewing enthusiasts who are looking for a
new pattern to sew. The website also offers free useful
information and helpful resources.
© Online Quilt Magazine.com All Rights Reserved P a g e | 8
Online Quilt Magazine – Vol. 2 No. 5
Designing Quilts using Traditional Quilt Blocks
By Penny Halgren from www.How-To-Quilt.com
A nine patch block is divided into 9 squares that
make up one block – three up and down and
three across, making a total of 9 patches.
The secret of successful quilt making and
designing quilts is being able to look at a quilt
block and divide it into units.
Most traditional quilt blocks fit into a grid, which
relates to the number of squares the quilt block is
divided into.
For example, a four patch quilt block is divided
into 4 squares that make up one block. Two
squares across, two squares up and down - thus 4
patches.
However, a 5 patch block is divided into 25
squares – five up and down and 5 across. Twentyfive patches in all, but 5 by 5 is the key.
© Online Quilt Magazine.com All Rights Reserved P a g e | 9
Online Quilt Magazine – Vol. 2 No. 5
A 7 patch is divided similarly to a 5 patch – 7
squares up and down and 7 squares across. Fortynine patches in all, but 7 by 7 is how it is
remembered.
patterns with curves, diamonds, or any other
combinations.
As you choose quilt blocks to create your quilts, it
is much easier to use all the one type of block.
For example, choose to use all 4 patch blocks or
all 9 patch blocks.
Even if the block designs are different, the
finished blocks will fit together more easily if they
are all one type of block.
Each of these divisions is called a “patch.” Often
each patch is divided into triangles or squares
where you put different fabrics – thus creating
the unique design of a quilt block.
About the Author:
Penny Halgren is a quilter of more than 27 years, and
enjoys sharing her love of quilting with others. Sign up
for her free quilting tips, quilt patterns, and
newsletter at http://www.How-to-Quilt.com
Once you know how to identify each of these
types of blocks, it becomes easy to tell what size
to make each block.
The most popular quilt blocks seem to be the 4
patch and the 9 patch. At least there are more 4
patch and 9 patch quilt block patterns than there
are 5 or 7 patch quilt blocks, or quilt block
© Online Quilt Magazine.com All Rights Reserved P a g e | 10
Online Quilt Magazine – Vol. 2 No. 5
Hints and Tips From Brannie
By "Brannie" Mira-Bateman
Our new house has a big hole cut in the wall
between the sewing room and the big-chairs
room. If I need a short cut, I can jump up on the
back of a chair on one side, then through the wall
hole and onto the table with Mum's whirring
machine on.
While the Mum’s Away…..
My Mum went to a Quilt Show and Dad and I
were on our own for days and days. I still got
pats and cuddles, but not as many as when
Mum's here.
As I am an inside cat, it's a bit of a novelty when
wildlife comes in, but the things I like best are
flies. I love chasing them. I don't see many, but
it's fun leaping around trying to catch them.
It is boring without sewing going on, too. Dad
does stuff outside that I can't help with. He calls
me pet names, like 'Fungus Face'. I know he
loves me…
He needs me to sit on his knee when he is in the
office though and I quite like looking at the
moving pictures, but I've yet to find the mouse he
keeps talking about.
The other day a fly flew past and I was off in
pursuit! Through the hole in the wall it went with
me after it. It landed on the top of the machine.
I leapt - chair - table - slapped my feet on the
fly.... and the machine tipped over on to the
floor! BANG!! I don't know where the fly went,
but I tumbled over and fell as well! "Yeowww", I
said.
© Online Quilt Magazine.com All Rights Reserved P a g e | 11
Online Quilt Magazine – Vol. 2 No. 5
Dad came running as I picked myself up and did
he say, "Oh, poor Brannie. Are you all right?"
Not a bit of it! "Oh, no! Poor, poor machine. I
hope it's OK. Oh, dear, oh dear..." etc. Never
asked if I was hurt!!
He wouldn't talk to me for the rest of the day, but
he did mutter, "I hope your Mum doesn't notice
that crack!" as he put me to bed later.
I didn't ever find the fly again. It was all its fault
really.
Love Brannie
Brannie,
the Quilt Block of the Month Club Cat!
© Online Quilt Magazine.com All Rights Reserved P a g e | 12
Online Quilt Magazine – Vol. 2 No. 5
Scrap Quilt Patterns - 4 Easy Steps to the
Perfect Scrappy Quilt
By Julie A Baird from www.GenerationsQuilt-Patterns.com
Choosing fabric for a scrap quilt is like a big
scavenger hunt. You never know what you will
find or where you will find it, but you are sure to
uncover some real gems!
great (and something I recommend), but trusting
in your own eyes is just as valuable!
For my quilt, I chose a focus fabric with fish on it.
Not exactly pretty, but it was interesting.
What is a Controlled Scrappy Quilt?
Not every fabric in your stash is a contender for
this type of quilt. Our goal is to create a quilt with
a controlled color palette that uses a wide range
of quilt fabrics from your stash or shopping
excursions.
Step 1 - Choose a Focus Object
It's not necessarily a 'focus fabric'. Anything will
do here; but it must be pleasing to your eye. A
picture from a magazine, a string of beads, a
scarf...or yes, even a scrumptious piece of quilt
fabric. Having a basic knowledge of color theory is
Step 2 - The Hunt
There's only one guideline for finding fabric with
this method...
© Online Quilt Magazine.com All Rights Reserved P a g e | 13
Online Quilt Magazine – Vol. 2 No. 5
Your fabric choices must be friends with the focus
object.
Once you have a big pile of fabrics in your project
stash, it is...
Now what does that mean?
Step 3 - Time to Decide
They need not be exact matches in color, or in
brightness, and certainly not in scale or pattern.
The fabrics can be ugly. In fact, scrap quilts are a
wonderful place to put some of those ugly fabrics
that you can't for the life of you remember why
you bought.
Do you want your final quilt to 'read' a certain
color, say, as a 'red quilt'? Then be sure to add
more red fabrics to your pile. If you want it to
read as a total scrap quilt, then choose pretty
even piles of all the basic colors found in your
focus object. (For my fish quilt, the basic colors
were purple, fuchsia, gold, green, orange and
brown.) Not every fabric will make it into your
quilt...but that's just a good reason to make
another.
Stripes, plaids, batiks, reproductions, floral
fabrics...all these fabrics belong together in a
scrap quilt.
As you find them, whether from your coveted
stash or shopping forays, lay them out against
your focus object. If they 'play nicely' (again, no
reason for matchy-matchy here) it is a keeper for
now.
Be adventurous, but trust your instincts. Find
yourself hemming and hawing over a fabric? Then
it just does not belong. Do not over-think.
Step 4 - Put it Together
Sometimes a simple rule can take the fear out of
piecing a scrap quilt. With so many fabrics to
choose from in your project stash, it can be a bit
overwhelming.
When I piece scrap quilt blocks, the only rule I use
is that a color is only used once in the block,
unless the quilt block pattern calls more. For my
fish quilt each color was used just once in a block.
© Online Quilt Magazine.com All Rights Reserved P a g e | 14
Online Quilt Magazine – Vol. 2 No. 5
Once a fabric was used, it was put into the used
pile. That way there was an even distribution of
fabrics and colors across the whole top of the
quilt.
Sewing It Up!
In summary, to make a pleasing scrap quilt, just
follow these simple guidelines:
1. Choose a focus object that pleases YOUR
eyes
2. Fabrics in this project "stash" should be
friends with the focus object, no fighting
allowed!
3. Make your final selections for your project
stash
4. Employ simple rules to create each block
to control the quilt's overall appearance
(Now if you are curious, the finished scrappy quilt
with the fish focus fabric quilted up just fine. It
turns out, the focus fabric made the perfect
binding to tie the whole quilt together.)
The Fish Quilt is pieced and quilted by Julie Baird
using the quilt pattern “Untitled’ by Karen Stone.
About the Author:
Julie Baird is a quilt teacher, designer and fabric dyer
from Plainfield, IL. She believes you can learn to make
any quilt, one stitch at a time. Her website at
http://www.generations-quilt-patterns.com is here to
assist you with a variety of techniques and online
helps when you need it.
© Online Quilt Magazine.com All Rights Reserved P a g e | 15
Online Quilt Magazine – Vol. 2 No. 5
Balkan Puzzle or Windblown Star Quilt
By Rose Smith from www.ludlowquiltandsew.co.uk
With spring in the air and all the promise of summer
to come, I wanted to make something happy and
exuberant. I decided on the Balkan Puzzle quilt block,
also known as the Windblown Star. This block has
been around for nearly a hundred years and is made
from half square triangle blocks only, but manages to
look far more complicated than it really is.
It uses five fabric colours which is more than I often
use, but it gave the happy exuberance that I was
looking for.
To make this quilt I used half a yard each of five
fabrics, cutting each half yard into five 3.1/2" strips
across the width of the fabric. That is for the quilt top
only and the backing, binding and wadding will be
needed as well. The finished quilt size is 43" by 54" just right for a lap quilt or a throw.
© Online Quilt Magazine.com All Rights Reserved P a g e | 16
Online Quilt Magazine – Vol. 2 No. 5
To make the quilt top, cut four strips each of the brown, red and green and two strips of the yellow and flowered
fabrics into squares by cutting across the lengths of fabric at 3.1/2" intervals.
With right sides together place a green square with a
brown square. Mark a line along the diagonal and sew
a seam 1/4" either side of the line. Cut along the
marked line and you will have two squares each made
of a half square triangle of brown and of green.
Repeat with red and brown squares, red and flowered,
green and yellow squares.
Lay them out as shown. The Balkan Puzzle quilt block is
actually made of only two rows - the bottom two rows
and top two rows in the photo are the same as each
other.
Sew the quilt squares together in rows, then sew the
rows together in pairs and finally sew the pairs of rows
together to make a balkan puzzle quilt block. You
should be able to make 12 quilt blocks. I joined them
together as three rows of four quilt blocks. This gives a
quilt top measuring 31.1/2" by 41.1/2".
© Online Quilt Magazine.com All Rights Reserved P a g e | 17
Online Quilt Magazine – Vol. 2 No. 5
As ever, I wanted to use all the fabric up so for the quilt
border I cut two of the flowered strips in half along the
length so that I ended up with four strips 1.3/4" wide.
Sew one of these along each 41.1/2" edge of the balkan
puzzle quilt top. Cut the remaining two strips to 34.1/2"
long and sew these to the remaining two edges of the
quilt top. Keep the trimmed ends.
Putting aside the two yellow strips of fabric (to be used
for the outer quilt border), cut all the remaining fabric
into 3.1/2" squares. Sew the squares into two lengths
of 15 squares and two lengths of 14 squares. Sew the
15 square lengths to the long edges of the quilt top.
The remaining short edges of the quilts are actually
13.1/2 squares long, but I felt that it didn't show so I
used the 13.1/2 squares rather than trying to adjust the
length of each square to make it an exact number of
squares.
To finish off the quilt border I used the final lengths of
the yellow fabric. Cut the two lengths in half along the
length to make four 1.3/4" strips. Sew one each of
these to the short edges of the quilt. You will have a
short length left over from each one. Sew this and the
leftover flowered fabric to the end of the remaining
strips of yellow fabric and sew this lengthened strip to
the long edges of the quilt top.
© Online Quilt Magazine.com All Rights Reserved P a g e | 18
Online Quilt Magazine – Vol. 2 No. 5
The quilt border is now complete with the three layers
of quilt border and the only fabric left over is the two
short lengths of flowered fabric shown on the right.
The balkan puzzle quilt is now ready to be layered,
quilted and bordered. It's turned into a really bright
and cheerful quilt and as you can see on the right
there are additional designs like the brown and green
pinwheel where the quilt blocks meet.
~~~~~~~~~~~~~~~~~~~~~~~~~~~~~~~~~~~~~~~~~~~~~~~~~~~~~
About the Author:
Rose Smith was born and brought up in Zambia in Africa. She moved to the UK when she was 18 and now lives
in Shropshire, indulging her passion for quilting and sewing.
She has sewn all her life - ‘anything that stood still long enough’ in the words of her children - but now finds that
patchwork and quilting have taken over her life. She indulges this passion by posting patterns and tutorials on
her website for all to share. www.ludlowquiltandsew.co.uk
© Online Quilt Magazine.com All Rights Reserved P a g e | 19
Online Quilt Magazine – Vol. 2 No. 5
How To Spoil A Good Quilt Class
Edited By Annette Mira-Bateman from www.QuiltBlockoftheMonthClub.com
* Don't tell the students that they will have to
sign up for a series of 3 more classes in order to
finish the quilt. Everyone loves
a surprise!
The following suggestions come from the firsthand experience of one of our readers.
Remember, this is what NOT to do.
If you are the instructor:
* It's an evening class. It's fine to open a beer and
check Facebook while the students are sewing up
the project.
* Don't give out any written instructions - can't
let the student have something to follow on her
own.
If you are a student:
* Make sure the supply list is vague. Tell the
students to bring batting, but don't mention that
it should be a specific type
of fusible batting.
* Be sure to make the students buy a book for the
class, then tell us in the class that you aren't
going to follow those instructions.
* Be sure to bring a sewing machine that you
aren't familiar with. The instructor should know
how to work every brand and model that has
been made in the last 100 years. You get extra
bonus points if it is a brand new machine that you
have never taken out of the box!
© Online Quilt Magazine.com All Rights Reserved P a g e | 20
Online Quilt Magazine – Vol. 2 No. 5
* Sewing is fashionable again, so be sure to show
up to class fashionably late. Everyone can wait
for you.
* So you forgot the power cord - the shop should
have one that fits your machine.
* If you don't understand what the instructor just
said, be sure to ask the student next to you
instead of the instructor.
* You are the most important person in the class!
Be sure to hog the ironing board or cutting mat.
Nobody else wants to finish their project during
class.
* The instructor said a maximum of 6 students,
but you can make more money by squeezing in
an extra 2 students. Don't add any extra tables;
everyone can just snuggle up a bit closer.
* Schedule two classes at the same time right
next to each other. Neither class will be able to
hear their instructor or concentrate, but it's more
convenient for you.
* Don't inform the instructor about when
purchases have to be paid for during class. It's
better to wait until the end of the class so that
no-one gets out on time.
Editor: Thank you to the reader who compiled this
If you are the shop owner:
* Plug all the surge suppressors into the same
outlet so that all the students' sewing machines
will trip the circuit breaker.
(Also be sure that no-one in the shop knows
where the circuit breakers are.)
list. These things have been experienced by her first
hand! Quilt classes should be fun and informative. I'm
sure some of the "dont's" from the above list sound
familiar to any reader who's ever attended a class.
With a little forethought and consideration we could
all make learning to quilt more enjoyable for
everyone!
© Online Quilt Magazine.com All Rights Reserved P a g e | 21
Online Quilt Magazine – Vol. 2 No. 5
What's New from The Fat Quarter Shop
by Kimberly Jolly from www.FatQuarterShop.com
We're pleased to be able to bring you a selection
each month of the Newest Fabric Releases and
the new season fabric "must haves".
Celebrate this Christmas season at the Bowood
House with Robyn Pandolph and RJR Fabrics.
Beautiful tonal florals mix with dots, textures,
plaids and solids with true holiday shades of red,
green, tan and cream.
Bowood House is available in Fat Quarter
Bundles, Charm Packs, Twice the Charms and
yardage. This great holiday collection is also
available in 108” wide cotton and yarn dyed
woven yardage!
View this Range at:
http://www.fatquartershop.com/Bowood-HouseRobyn-Pandolph-RJR-Fabrics.asp
Bowood House by Robyn Pandolph from RJR Fabrics
© Online Quilt Magazine.com All Rights Reserved P a g e | 22
Online Quilt Magazine – Vol. 2 No. 5
Flurry is available in Fat Quarter Bundles, Charm
Packs, Jelly Rolls, Layer Cakes and yardage. You’ll
want to snuggle up with our Flurry Quilt Kit!
Check out This Collection at:
http://www.fatquartershop.com/Flurry-Kate-SpainModa-Fabrics.asp
Flurry by Kate Spain for Moda Fabrics
Brrr! From the first frost of the season to the first
sign of snow, Flurry by Kate Spain for Moda
Fabrics is a winter wonderland of prints inspired
by the cozy warmth of a favorite sweater.
Motifs from traditional Nordic knits, along with
poinsettias, cardinals and snowflakes are sure to
keep you toasty and inspired all winter long.
How The Grinch Stole Christmas from Dr Seuss
and Robert Kaufman Fabrics
© Online Quilt Magazine.com All Rights Reserved P a g e | 23
Online Quilt Magazine – Vol. 2 No. 5
Take a walk down memory lane with Robert
Kaufman’s newest Dr. Seuss collection – How the
Grinch Stole Christmas!
You’ll love the tonal Who prints, the Grinch
dressed as Santa and the large scale scenes.
Wonky spots and stripes help round out this
collection.
How the Grinch Stole Christmas is available in
both cotton and flannel Fat Quarter Bundles and
yardage. Every Dr. Seuss lover will want one of
our two great quilt kits … the perfect Christmas
gifts!
Check this out at:
http://www.fatquartershop.com/Grinch-FabricRobert-Kaufman-Fabrics.asp
© Online Quilt Magazine.com All Rights Reserved P a g e | 24
Online Quilt Magazine – Vol. 2 No. 5
Trick or Treat is available in Fat Quarter Bundles,
Charm Packs, Jelly Rolls, Layer Cakes and yardage.
Boo!
See These fabrics at:
http://www.fatquartershop.com/Trick-or-Treat-DebStrain-Moda-Fabrics.asp
Trick Or Treat by Deb Strain
Carmel apples, bats, candy corn and witches hats!
What could be more ghostly at Halloween?
Don't keep this Online Quilt
Magazine all to yourself – it's FREE,
so share it with your Quilting Guilds
and Friends!
Deb Strain’s whimsical group, Trick or Treat,
combines the goodies of Halloween with the “not
so scary” witches costumes of the season. A
bright and whimsical collection sure to add to the
fun of the season.
Don't wait - Invite them to
www.OnlineQuiltMagazine.com to
Subscribe and receive each New
Issue as soon as it's Published!
© Online Quilt Magazine.com All Rights Reserved P a g e | 25
Online Quilt Magazine – Vol. 2 No. 5
African American Quilting History 101
By Laurel Harper
The history of African American quilting is a
fascinating study. Quilting itself is believed to
have been practiced as long ago as Ancient Egypt.
Also somewhere in our past, quilted garments
were worn by soldiers under armor as they went
to war.
The form of quilting with which we are most
familiar appeared perhaps sometime in the 15th
century. It is quite possibly because of the need
to keep warm in pre-electric, pre-gas homes that
people began to take two layers of fabric,
sandwiched with some type of filler, and stitch all
three layers together.
Over the next few centuries, the art of quilting
evolved, as did the uses for quilted items. Quilts
came to be used for other purposes than
bedcoverings, and quilting was raised to an art
form.
African-American quilts are no exception. In their
pre-quilt form, African textiles created in Africa
were noted for using very bold, striking colors
arranged in very graphic patterns.
As Africans were captured, enslaved, and
transported to America, they naturally brought
several cultural elements with them, textile arts
notwithstanding. As they became assimilated into
the Eurocentric American culture, they turned
their textile-making skills into quiltmaking,
incorporating design elements they brought with
them to this new art form.
It is important to note that these enslaved
Africans did not have a wealth of time or
resources at their disposal to practice their art
© Online Quilt Magazine.com All Rights Reserved P a g e | 26
Online Quilt Magazine – Vol. 2 No. 5
form. When they were able to make quilts, it was
often for the white mistress of the plantation,
who gave materials to the particular slave who
had been pressed into sewing and quiltmaking. A
number of these quilts needed to conform to the
mistress' requirements, as they were intended to
grace her home. Very few were created as per
the design of, and for the use by, the slave.
This emerging African-American art form of
quilting went largely unnoticed, especially by the
quilting world, which chose not to acknowledge
what it considered to be sub-standard work
unworthy of qualifying as true quilting in the
classic sense. Yet African Americans continued to
quilt on into the post-slavery period of
Reconstruction, and into the 20th century.
Some quilts, however, were designed by slaves.
With pilfered or leftover scraps and materials
from their owners, slaves would use stolen
moments late at night, once they were allowed to
retire for the night, and create quilts.
It wasn't until the 1970s that America finally
began to recognize and acknowledge the work of
African American quilters. However, only those
quilts which fit within very narrowly defined
parameters, or were created by quilters of a
specific geographic region, were acknowledged,
so the majority of African American quilters were
still largely ignored.
Slaves would especially have been in need of
warm bedcoverings, living in the ramshackle or
improvised dwellings that their owners provided
for them. While the design of the quilts had much
to do with the materials available, slaves were
still able to incorporate elements of their own
African culture.
During the 1980s, African American quilters as a
whole finally began to come into their own. No
longer narrowly defined by a particular style, or
as natives of a particular region, African American
quilts, at long last, were being recognized as true
quilts and an art form.
© Online Quilt Magazine.com All Rights Reserved P a g e | 27
Online Quilt Magazine – Vol. 2 No. 5
African American quilt guilds were formed.
Exhibits featuring African American quilts were
held at various galleries and museums across the
country. The beginnings of this art form, once
ignored, were now being researched with zeal
and at great length.
Discover new and exciting projects to quilt and
sew each month with clear and easy to follow
instructions.
The African American quilt, after centuries, finally
came into its own.
Visit the website and subscribe to Ludlow Quilt
and Sew’s free monthly newsletter now.
LUDLOW QUILT AND SEW
www.ludlowquiltandsew.co.uk
About The Author:
Not everyone who loves quilts knows how to create them.
For more information, refer to the author's website at
http://how-to-quilt.org
Article Source: http://EzineArticles.com/?expert=Laurel_Harper
© Online Quilt Magazine.com All Rights Reserved P a g e | 28
Online Quilt Magazine – Vol. 2 No. 5
© Online Quilt Magazine.com All Rights Reserved P a g e | 29
Online Quilt Magazine – Vol. 2 No. 5
RECIPE - 5 Minute Chocolate Mug Cake
(The Most Dangerous Cake Recipe)
Add dry ingredients to mug, and mix well.
Ingredients:
4 tablespoons flour
Add the egg and mix thoroughly. Pour in
the milk and oil and mix well. Add the
chocolate chips (if using) and vanilla, and
4 tablespoons sugar
mix again.
2 tablespoons cocoa
Put your mug in the microwave and cook for
1 egg
3 tablespoons milk
3 tablespoons oil
3 tablespoons chocolate chips (optional)
A small splash of vanilla extract
1 large coffee mug
3 minutes at 1000 watts (high). The cake
will rise over the top of the mug, but don’t
be alarmed! Allow to cool a little, and tip
out onto a plate if desired.
EAT! (This can serve 2 if you want to feel
slightly more virtuous.) Any why is this the
most dangerous cake recipe in the world?
Because now we are all only 5 minutes away
from chocolate cake at any time of the day
or night!!!
© Online Quilt Magazine.com All Rights Reserved P a g e | 30
Online Quilt Magazine – Vol. 2 No. 5
Block of the Month
This month’s Block is a striking star-like pattern
made simply from pieced squares and triangles.
You will be able to chain piece these units for
quick construction, and this block would look
great in a repeated setting or even as a scrappy
quilt!
To make this 10 inch block as shown, you will
need four different fabrics and once you have
rotary cut the pieces according to the Cutting
Diagram, you can piece them together as shown
below.
© Online Quilt Magazine.com All Rights Reserved P a g e | 31
Online Quilt Magazine – Vol. 2 No. 5
© Online Quilt Magazine.com All Rights Reserved P a g e | 32
Online Quilt Magazine – Vol. 2 No. 5
Mitred Corners on Bindings
Today's tips:
Are you frightened of mitred corners on your
bindings? Don't be.
We’re on a roll! Judy Brownd sent in this great
template tip this month… Thanks Judy!!
“When making templates, they usually need to be
replaced often, as the rotary blade will nip off a
tiny piece of the template here and there. In
order to make my template once and have it
always accurate, I use this simple trick.
Trace the template outlines on some clear
template material. I prefer the 8-1/2" x 11"
plastic sheets marked with a light blue grid as
they are oh-so accurate. Mark your sewing line
using an ultra fine black marker -- I use a Sharpie,
as it makes a nice dark, crisp thin line. Then, cut
the template out 1/8' away from the black line.
This small amount of plastic will keep the blade
away from the template. Put the template on
your fabric, lay your clear ruler's 1/4" line on the
template's black marker line, and cut with a
rotary cutter. Perfect 1/4" seam allowances!”
Since Eileen from Yorkshire told me about the
"three li'l mudge-ick stitch-iz", I have no trouble
with these corners.
Stitch as usual up to 1/4 inch from the edge at
which you're turning. Stop with the needle in
your work, lift the foot and turn your work 45
degrees so that the corner point faces you. Then
stitch towards the corner - about 3 stitches does
it.
Lift the needle and foot, but don't pull your work
out very far.
Just enough to fold the binding up firmly against
these angled stitches, then fold it down ready to
sew the next side. Don't cut the threads; there'll
only be a small loop. Commence stitching right at
the top of the new side. When you fold the
binding over to hand sew the back, you'll find the
corners look just right.
© Online Quilt Magazine.com All Rights Reserved P a g e | 33
Online Quilt Magazine – Vol. 2 No. 5
Quilters' Horoscope
By Pauline Rogers from www.QuiltersWorld.com.au
A humourous compilation of character traits of quilters according to their zodiac signs. Compiled by a
quilting tutor with over twenty years experience teaching patchwork and quilting but zero years writing
horoscopes.
Taurus - April 21 to May 20
Taurans are the quilters who always finish a project, as they are persistent
and determined. When attending workshops or using a pattern they will
follow every instruction to the letter.
They can be greedy when it comes to their stash, as they know the value of
material. They save every bit of scrap. However, they are warm-hearted
and loving to such a degree that they have given away nearly every quilt
they have ever made.
They are gifted artists, excelling at sewing, patchwork and quilting. The
stitching in their quilts is of such high quality that their quilts will endure for
eons.
Aries design from the "Quilting With The Stars" quilt from the Quilt Block of the Month Club.com
© Online Quilt Magazine.com All Rights Reserved P a g e | 34
Online Quilt Magazine – Vol. 2 No. 5
YES, We Want to Hear From
You!
"Quilt-y" Sayings…
• A bed without a quilt is
like a sky without stars.
• Old quilters never die, they
just go batty.
• A good friend is like a
warm quilt wrapped
around the heart.
As our Online Magazine continues to grow each
month, we need your feedback in order for us to
continue to improve our publication for you.
•
We want to know how you liked it.
•
We want to know the topics you're
interested in.
•
We want to know if you have any
suggestions, Hints or Tips of your own that
you'd like included, or if you know anyone
we should include a story on!
Please send me an email with your Testimonial,
Suggestion or Enhancement – I'd love to hear
from you!
If you'd like to submit an Article, or a Project
for Publication, or take advantage of our Very
Very Reasonable Advertising Rates, please
email details or queries to Jody at
jody@onlinequiltmagazine.com .
Send all emails to:
jody@onlinequiltmagazine.com
© Online Quilt Magazine.com All Rights Reserved P a g e | 35


© Copyright 2025