How to Write a Research Paper Step-By-Step Student Handbook
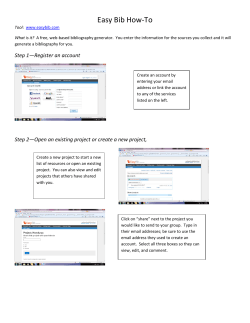
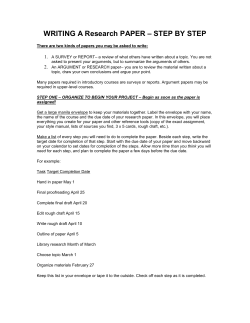
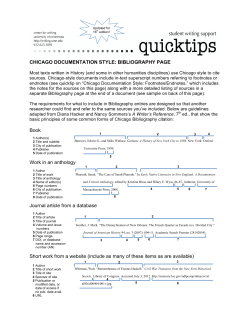
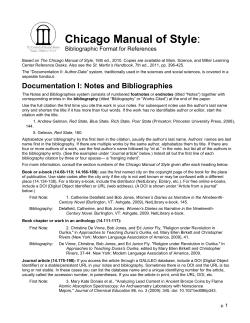
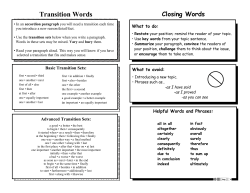
How to Write a Research Paper Step-By-Step Student Handbook Integrated Language Arts and Social Studies West Orange Public Schools Liberty Middle School TABLE OF CONTENTS INTRODUCTION How to Write a Research Paper Page 3 STEP 1 Determine the Purpose of Your Paper Page 4 STEP 2 Choose a Specific Topic Page 5 STEP 3 Write a Thesis Statement Page 6 STEP 4 Locate Resources and Materials Page 7 STEP 5 List the Points You Wish to Make Page 8 STEP 6 Outline the Information You Have Gathered Page 9 STEP 7 Prepare Bibliography Cards Page 10 STEP 8 Take Relevant Notes Page 11 STEP 9 In-Text Citations Page 12 STEP 10 Write Your Introduction Page 13 STEP 11 Write Your Body of Your Paper Page 14 STEP 12 Write Your Conclusion Page 15 STEP 13 Revise and Rewrite Your First Draft Page 16 STEP 14 Writing Your Final Draft Page 18 STEP 15 Prepare a Bibliography Page 19 STEP 16 Polish Your Paper Page 22 STEP 17 Evaluate Your Paper Page 23 STEP 18 Presenting Your Research Page 24 STEP 19 Congratulations! Your Paper is Complete Page 25 2 INTRODUCTION How to Write a Research Paper How to Write a Research Paper was designed to walk you step-by-step through the process of writing the research paper. This handbook will make the research paper seem less intimidating and provide you with an understanding of the process of writing the research paper beginning with the selection of a topic and ending with the final “polish.” Written in friendly language, the text moves through each step in the process of writing a great research paper. What image comes into mind as you hear the words “research paper?” Bet you thought about working with stacks of articles and books, and hunting for the "treasures" of other people’s thoughts? Whatever image you create, however, you are probably envisioning sources of information--articles, books, people, artworks, and websites filled with great information. Yet a research paper is more than the sum of your sources and more than a collection of different pieces of information about a topic. A research paper analyzes a perspective or argues a point. Regardless of the type of research paper you are writing, your finished research paper should present your own thinking backed up by others' ideas and information. Research papers are generally longer pieces of written work than essays. Writing a research paper involves all of the steps for writing an essay plus some additional ones. To write a research paper you must first do some research, that is, investigate your topic by reading about it in many different sources, including books, magazines, newspapers, and the Internet. In some cases you may also conduct interviews. The information you gather from these sources is then used to support the points you make in your paper. Writing a research paper also involves documenting your sources of information. This way the reader knows where you got your information and can judge whether it is reliable. This handbook will assist you in making the research paper less complicated and more readily understood. Hopefully, the experience you will gain by writing a research paper and following it through to the end will give you a sense of accomplishment. Once you have completed and presented your paper, you will have acquired an understanding of both the topic, as well as the research involved in producing a well-written paper. 3 STEP 1 Determine the Purpose of Your Paper What is the purpose of this research paper? Many research papers are assigned as a way to have students learn more about a topic that excites and interests them on a personal level. Still others are so that students research an important topic in the area they are studying so that they can become experts on it. What is your purpose of your paper? In a research paper, your task may be: To explain, To analyze, or To persuade. In an explanatory paper, you will give factual information to your audience. You may define and describe a topic. For example, you may choose to define penny stocks and explain how they have made some individuals wealthy. Another explanatory paper might trace and describe the origin of Greek mythology. When writing an analytical paper, you must thoroughly investigate a subject. You will examine the different elements of your topic and compare and contrast those elements. Researching the Greek Indians and their customs might require an analytical paper. As a researcher, you might analyze heart attacks, their causes, preventions, and treatments. If you are writing a persuasive paper, you will choose a position on a topic and defend your position. If you are researching violence on television, you may choose to prove that violence causes aggressive behavior in teenagers. A persuasive research paper often answers a question posed by the topic, such as “Can we save the ozone layer from destruction?” Purpose for Your Research Paper This particular research paper is being written because it is a mandatory requirement in the West Orange Public School District that all eighth grade social studies and language arts students write a competent, content-based, five to eight page research paper before going on to high school. A topic has been selected for you so that not only is this requirement fulfilled but you will learn new information relating to the eighth grade curriculum as well. 4 STEP 2 Choose a Specific Topic Choose Your Topic Try to pick a topic that's fun and interesting. If your topic genuinely interests you, chances are you'll enjoy spending time working on it and it won't seem like a chore. Finding a topic can be difficult. Give yourself plenty of time to read and think about what you'd like to do. Trying to answer questions you have about a particular subject may lead you to a good paper idea. o What subject(s) are you interested in? o What interests you most about a particular subject? o Is there anything you wonder about or are puzzled about with regard to that subject? Once you have a topic, you will probably need to narrow it down to something more manageable. For example, say you are assigned to write a 10-page paper, and you decide to do it on Ancient Egypt. However, since Ancient Egypt is a big topic, and you only have a limited number of pages, you will have to focus on something more specific having to do with that topic. TOO GENERAL: Ancient Egypt. REVISED: The building of the pyramids of Ancient Egypt. One method for coming up with a more specific focus is called brainstorming (or free writing). Brainstorming is a useful way to let ideas you didn't know you had come to the surface. o Sit down with a pencil and paper, or at your computer, and write whatever comes into your head about your topic. You may want to use a graphic organizer to brainstorm some of your thoughts and ideas. o Keep writing for a short but specific amount of time, say three to five minutes. Don't stop to change what you've written or to correct spelling or grammar errors. o After a few minutes, read through what you've written. You will probably throw out most of it, but some of what you've written may give you an idea that can be developed. o Do some more brainstorming and see what else you can come up with. o You may want to ask a classmate, teacher, friend, or family member to look over what you have completed so far. Helpful suggestions even in the form of constructive criticism can help you see things from a different perspective and be very helpful. 5 STEP 3 Write a Thesis Statement What is a Thesis Statement? A thesis statement declares what you believe and what you intend to prove. A good thesis statement makes the difference between a thoughtful research project and a simple retelling of facts. Thesis Statement Stating your main idea, or thesis, is one of the most important steps in developing your topic because it sets in motion your investigation of the facts so that you can reach an original conclusion in your paper. You may think of the thesis statement as a road map, or a guide, to take you in the right direction. For example, if your subject is dinosaurs, and your topic is Characteristics of Carnivorous Dinosaurs, a possible thesis might be: The Allosaurus and the Tyrannosaurus have big teeth and powerful claws for eating meat. The thesis statement is typically located at the end of your opening paragraph. The opening paragraph (introduction) serves to set the context for the thesis. 6 STEP 4 Locate Resources and Materials Look for Sources of Information If time permits, a trip to your school media center or local library would be a great idea. While there, you may want to check out the many sources you can use to find information relating to your topic. Use the electronic catalog or browse the shelves to look for books on your topic. If you find a book that is useful, check the bibliography (list of sources) in the back of that book for other books or articles on that topic. Also check indexes of periodicals and newspapers. Check with a media specialist if you need help finding sources. Try to use as many different types of sources as you can, including books, magazine articles, and Internet articles. Don't rely on just one source for all your information. You will keep a record of all the sources that you use. Include the title of the source, the author, publisher, and place and date of publication on an index card according to MLA format guidelines. 7 STEP 5 List the Points You Wish to Make Organizing Your Information Once you have chosen the topic for your research paper and have located and surveyed a number of resource materials, you are ready to list all of the points you wish to make or questions you wish to ask in the paper. When making this list, begin to think about a purpose statement or the main idea (the thesis statement). This main idea will be included in the introductory paragraph. You will organize the list of points in an outline (preliminary outline). Preliminary Outline The first (or preliminary) outline is intended to serve as a guide for writing your research paper. Begin the outline by thinking about your topic and asking yourself questions to discover the major categories (main topics) and supporting information (subtopics). Using the answers to your questions as your headings and subheadings, you may begin to write your preliminary outline. As you begin to read through your note cards, you will encounter some irrelevant (unimportant) points. These can be eliminated. Your reading will also suggest new points that you will want to include in the paper; therefore, keep in mind that you should revise and edit your preliminary outline as you continue to take notes. Sample Preliminary Outline 8 STEP 6 Outline the Information You Have Gathered Final Outline Using the information collected on the note cards; develop a final outline to organize your ideas. An outline shows your main ideas and the order in which you are going to write about them. It's the bare bones of what will later become a fleshed-out written report. Guidelines for Writing a Final Outline The title of your paper goes at the top of the page. Place a Roman number followed by a period before each main topic. Example: I. Rural Life in Louisiana Subtopics are listed under the topics. Use capital letters (A, B, C,…) followed by periods to label subtopics. Place the letters directly underneath the first letter of the first word of the main topic. Example: I. Later Years of Stardom A. Later movies B. Retirement Do not place a period after a main topic or a subtopic, unless you are writing a sentence outline. Example: II. Kinds of Dinosaurs Begin the main topic and subtopic with a capital letter, and capitalize any proper nouns. An outline should use parallel structure – the use of the same kind of word or phrase. Example: I. Later Years of Stardom A. Later movies B. When did she retire from movies? This example is incorrect because the topic and first subtopic are written as phrases and the second subtopic is written as a complete sentence (a question). The structure is not parallel. 9 STEP 7 Prepare Bibliography Cards Writing Bibliography Cards Anytime you find an information resource, document it making a bibliography card. Record required bibliographic information on separate four-by-six inch index cards or paper cut to a standard size. Using card-size notes will make alphabetizing the resources easier and allows for adding or deleting references without having to recopy an ordered list. Number the cards. The numbers will come in handy as you begin to take notes. These bibliography cards will be an important resource as you create your bibliography. Each type of resource will require recording different information on the card. Check the list below to make sure you record the information you will need when you prepare your bibliography. Sample Bibliography Cards For a book with single author: For a book with multiple authors: For a Web Site: For an encyclopedia article with an author: 10 STEP 8 Take Relevant Notes As you discover sources and begin to read about your research paper, you will also begin the process of taking notes. Talking notes is an important part of the process of writing a research paper. Many writers decide to take notes on index cards or slips of paper, using a different card for each note. Helpful Hints for Taking Notes Write in the top left-hand corner of the card a word or phrase that summarizes the information on the note card. Write only on the front side of the note card. Write the number of the bibliography card you made for the source of the information in the top right-hand corner of the new note card. Write the information on the note card in your own words (in other words, paraphrase). Write only one idea per note card. Do not write notes from two sources on the same card. If you must use quoted material, write the material enclosed in quotation marks. Limit your use of direct quotes when taking notes. You want to demonstrate that you are capable of expressing ideas in your own words. At the bottom of every note card, write the page number of the source from which you gathered the information. Writing Note Cards with Direct Quotations If you do come across a line, sentence, or phrase that you want to copy into your paper, place quotation marks around the borrowed material and acknowledge where you found the information. However, a good research paper will not contain much copied material because a young research scholar will instead paraphrase ideas, and then draw his or her own conclusion. The following note card shows a direct quote. Note that the quoted material is placed with in quotation marks. 11 STEP 9 In-Text Citations The Modern Language Association of America, or MLA, is a writing style used to create research papers and dates back to the 19th century. It is not the only style, but it is the one endorsed by the WOHS Style Manuel. The Modern Language Association recommends a system of in-text citations. Here, briefly, is how the MLA citation system usually works: 1. The source is introduced by a signal phrase that names its author. 2. The material being cited is followed by a page number in parentheses. 3. At the end of the paper, a list of works cited (arranged alphabetically according to authors’ last names) gives complete publication information about the source. In-Text Citation According to Donald Redelmeier and Robert Tibshirani, “The use of cellular telephones in motor vehicles is associated with a quadrupling of the risk of a collision during the brief period of a call” (453). Enclose Borrowed Language In Quotation Marks: To show readers that you are using a source’s exact phrases or sentences, you must enclose them in quotation marks unless they have been set off from the text by indenting. To omit the quotation marks is to claim – falsely – that the language is your own. Such an omission is plagiarism even if you have cited the source. Borrowed Language In Quotation Marks Matt Sundeen points out that in cars of the future drivers will have “concierge services, web-based information, online e-mail capabilities, CD-ROM access, on-screen and audio navigation technology, and a variety of other information and entertainment services” (1). Put Summaries And Paraphrases In Your Own Words: A summary condenses information from a source; a paraphrase repeats this information in about the same number of words. When you summarize or paraphrase, it is not enough to name the source; you must restate the source’s meaning using your own language. You are guilty of plagiarisms if you half-copy the author’s sentences – either by mixing the author’s phrases with your own without using quotation marks or by plugging your synonyms into the author’s sentence structure. To avoid plagiarizing an author’s language, resist the temptation to look at the source while you are summarizing or paraphrasing. Close the book, write from memory, and then open the book to check for accuracy. This technique prevents you from being captivated by the words on the page. Acceptable Paraphrase Radio show hosts Tom and Ray Magliozzi claim that motor vehicle manufactures do not always design features with safty in mind. For example, when designers replace radio, CD player, and temperature control knobs with touch-sensitive panels, they were forgetting one thing: To use the panels, drivers would need to take their eyes off the road (3). 12 STEP 10 Write Your Introduction With your note cards and preliminary outline as references, you are ready to write the first draft of your research paper. As you begin, concentrate on putting down your ideas. Schedule your time wisely so that you will have time to edit your work to determine what needs to be revised or deleted. Writing Your Introduction The introduction is the first paragraph of your research paper. It often begins with a general statement about the topic and ends with a more specific statement of the main idea of your paper. When writing the introductory paragraphs, keep in mind the four main purposes of an introduction. An introduction: Explains the subject, Provides background information, States the purpose of the research paper, and Make a thesis statement. Grab Your Reader’s Attention It is important to grab your reader’s attention. Do this by Starting with a quotation, Beginning with a question, Stating a surprising or unusual fact, or Relating the topic to personal experiences. Points to Remember When writing your introduction: Avoid giving the title of your research paper in the introductory paragraph. Avoid using a statement such as, “The reason I am writing this paper is…” or “I chose this topic because…” Avoid lengthy or complicated questions that may confuse the reader. Rhetorical questions, however, are permissible. Avoid using a quotation that is not relevant to your topic. When including a quotation, be sure to connect it with your explanation. 13 STEP 11 Write the Body of Your Paper Writing Your Body The body of the paper follows the introduction. It consists of a number of paragraphs in which you develop your ideas in detail. A variety of organizational techniques may be used when writing the body of your research paper. Think about utilizing one or more of the following techniques: Chronological order Trace historical events and provide explanations with a sequence of events by time. Compare and contrast Use this technique to compare the past and the present, to show two sides of a topic, or to compare both the positive and negative aspects of an issue. Cause and effect Relate the consequences and causes of an event as part of the explanation. Definition Help your reader understand a difficult or complex subject. Classification and analysis Identify the reasons for and the consequences of various issues as you present information. Question and answer Tie your topic to the research by asking questions and providing answers. Evidence from source material Cite authorities on a particular subject through the use of quotations, paraphrased information, and summaries. 14 STEP 12 Write Your Conclusion Writing Your Conclusion The conclusion is the last paragraph of your research paper. When writing the conclusion, restate your thesis. Point out how the thesis logically results from the analysis and discussion of points made in your research. The conclusion should also include any opinions you may have drawn based on the research and study prescribed in the report. Summarize the main points of your research paper and include a sentence or two that will help the reader answer the question, “So what?” or “Does this really matter?” Be sure to support any statements you make with examples of facts. Do not include any new information or documentation in your conclusion. Several of the following techniques may be helpful as you write your conclusion: Review your main ideas. Include a quotation or two to defend your position. If you are writing about a particular person, discuss his or her contributions to society. Offer suggestions for new or additional research. Discuss the fact or statistics included in your research and relate them to your final statement. Challenge commonly held points of view or assumptions in order to inform the reader of your perspective. Finish with an anecdote, a brief narrative which demonstrates the subject with descriptions, dialogue, and action. 15 STEP 13 Revise and Rewrite Your First Draft Revising and rewriting are important steps in writing a research paper, just as they are vital to the writing process itself. Regardless of how well you have planned, researched, and organized, you will need to continue making changes as you write. During this stage of writing, make any necessary changes to improve the ideas expressed in your paper. Keep in mind that even the best writers spend time revising and editing their first drafts! It is very important to be flexible. Think of ways you can improve your selection of words and transitions, and utilize parallel structure in sentences and paragraphs. Move through the following steps as you revise and rewrite your first draft: Let it seat for a while. Why not give yourself time to write the first draft and then put it aside for a few days? During this time, you can reflect on what you have written. Students often find that after a few days, their thoughts become more organized. Develop and use a system for making corrections. Mark through words, phrases, clauses, or sentences that need revising. Do not eliminate anything yet, as you may be able to use the information later. Reread your draft aloud. Are there sentences or paragraphs that sound out of place or are poorly written? If so, indicate these in the margins of your paper. Grab the reader’s attention. Make sure that your introductory paragraph catches the reader’s attention and introduces the thesis statement. Make your organization easy to follow. Each paragraph should contain a topic sentence with supporting details. Every supporting sentence in each paragraph should relate to its topic sentence. Check to make sure your sentences are clearly written and easy to read. Add transitional words (e.g., while, after, since, although, first, next, further, also, finally, furthermore, in addition, consequently) to show how ideas are related to one another. Check your paper for accuracy. Check punctuation, spelling, word usage, and capitalization. Consider asking a classmate, friend, parent, relative, or another teacher to assist you in checking for accuracy. 16 STEP 13 Revise and Rewrite Your First Draft Be sure that your sources are properly documented. If sections of the paper are not written in your own words, make sure that you have given proper credit for “borrowing” the writer’s words (either quoted directly or paraphrased). Place quotation marks around another writer’s exact words. Proofread your research paper carefully. Your final copy should be error-free and neat. It is a good idea to proofread your paper at least three times on three different occasions. Restate your thesis in the concluding paragraph. Reword your main idea for the final (restated) thesis in the concluding paragraph. Write the final copy in ink, or type it using a computer. Write or type on only one side of the paper. Number the pages preceded by your last name in the upper right-hand corner of each page, one-half inch below the top edge. Double-space the research paper if you are typing it. Check your final outline and add a title and identification. Make sure you have correctly written a title and identification and outline according to your teacher’s specifications. 17 STEP 14 Writing Your Final Draft The time has arrived to write your final draft. How should you proceed? You may write your paper by hand or using a computer keyboard. Just remember, your final paper should be neat as well as complete. Using a computer to write your final research paper will save you time by allowing you to store and retrieve your text and make changes or edit your paper instantly without rewriting or retyping the entire page. Proofreading at this stage is crucial because you are able to check your paper one last time for organization, clarity, parallel structure, word choice, spelling, and punctuation. Listed below are some helpful guidelines to follow when copying your final draft. These guidelines can be applied to both a handwritten paper or one that has been typed using a computer. If you are handwriting your paper, use lined paper and black or blue ink. Do not skip lines if you are writing on lined paper. Double-space if you use the computer to type your paper. Indent one inch for the top, left, right, and bottom margins for both handwriting and typed papers. Always indent the beginning of each paragraph. Prepare a title and identification that includes the title of your paper, your name, the teacher’s name, the course title, and the date on separate lines against the left margin. Then center your title. Include a complete bibliography. Number the pages of your research paper beginning with the first page of your paper. The bibliography page is also numbered. Do not discard any materials (bibliography cards, note cards, outlines, and draft) as you may be asked to turn these in to your teacher. 18 STEP 15 Prepare a Bibliography A bibliography is a list of sources (books, encyclopedia articles, magazine, films, interviews, lectures, letters, television programs, Internet, DVDs, CDs, etc.) that you used in writing your research paper. The bibliography is included on the last page of your research paper. Because you have already made a bibliography card for each of your sources, follow these simple steps to prepare your bibliography: Alphabetize the cards by author’s last names. If the source does not include an author, use the first word in the title for that card. Following the appropriate format for documentation, record the entries on a single sheet of paper. Formatting a Bibliography For a book: Author (last name first). Title of the book. City: Publisher, Date of publication. EXAMPLE: Dahl, Roald. The BFG. New York: Farrar, Straus and Giroux, 1982. For an encyclopedia: Encyclopedia Title, Edition Date. Volume Number, "Article Title," page numbers. EXAMPLE: The Encyclopedia Britannica, 1997. Volume 7, "Gorillas," pp. 50-51. For a magazine: Author (last name first), "Article Title." Name of magazine. Volume number, (Date): page numbers. EXAMPLE: Jordan, Jennifer, "Filming at the Top of the World." Museum of Science Magazine. Volume 47, No. 1, (Winter 1998): p. 11. 19 STEP 15 Prepare a Bibliography For a newspaper: Author (last name first), "Article Title." Name of newspaper, city, state of publication. (date): edition if available, section, page number(s). EXAMPLE: Powers, Ann, "New Tune for the Material Girl." The New York Times, New York, NY. (3/1/98): Atlantic Region, Section 2, p. 34. For a person: Full name (last name first). Occupation. Date of interview. EXAMPLE: Smeckleburg, Sweets. Bus driver. April 1, 1996. For a film: Title, Director, Distributor, Year. EXAMPLE: Braveheart, Dir. Mel Gibson, Icon Productions, 1995. CD-ROM: Disc title: Version, Date. "Article title," pages if given. Publisher. EXAMPLE: Compton's Multimedia Encyclopedia: Macintosh version, 1995. "Civil rights movement," p.3. Compton's Newsmedia. Magazine article: Author (last name first). "Article title." Name of magazine (type of medium). Volume number, (Date): page numbers. If available: publisher of medium, version, date of issue. EXAMPLE: Rollins, Fred. "Snowboard Madness." Sports Stuff (CD-ROM). Number 15, (February 1997): pp. 15-19. SIRS, Mac version, Winter 1997. 20 STEP 15 Prepare a Bibliography Newspaper article: Author (last name first). "Article title." Name of newspaper (Type of medium), city and state of publication. (Date): If available: Edition, section and page number(s). If available: publisher of medium, version, date of issue. Stevenson, Rhoda. "Nerve Sells." Community News (CDROM), Nassau, NY. (Feb 1996): pp. A4-5. SIRS, Mac. version, Spring 1996. EXAMPLE: Stevenson, Rhoda. "Nerve Sells." Community News (CD-ROM), Nassau, NY. (Feb 1996): pp. A4-5. SIRS, Mac. version, Spring 1996. Internet: Author of message, (Date). Subject of message. Electronic conference or bulletin board (Online). Available e-mail: LISTSERV@ e-mail address EXAMPLE: Ellen Block, (September 15, 1995). New Winners. Teen Booklist (Online). Helen Smith@wellington.com. World Wide Web: URL (Uniform Resource Locator or WWW address). author (or item's name, if mentioned), date. EXAMPLE: (Boston Globe's www address) http://www.boston.com. Today's News, August 1, 1996. 21 STEP 16 Polish Your Paper Attention to Detail Pays Off After you have finished your final research paper, and before it is ready to be turned in to your teacher, carefully proofread the paper. Remember that you are totally responsible for any mistakes in your paper, whether it was typed by you or typed by someone else. Before you submit your paper, use the statements below as a checklist: I have carefully proofread my entire research paper and made necessary corrections. I have numbered each page beginning with page one. bibliography page. I have read my outline, checking for parallel structure, punctuation, alignment, and capitalization. I have checked each page of my research paper for misspelled words and incorrect punctuation. I have checked the margins on each page to be sure that they are in accordance with my teacher’s directions. I have looked at my paper carefully and made chances to improve word choice. I have checked my paper for errors in sentence structure as well as parallel structure. I have checked to make sure that my parenthetical documentation is written and punctuated correctly. I have checked for accuracy in my direct quotations and paraphrased material. I have checked for organization and transition in my paragraph development. I have checked my bibliography to make sure that the sources are listed in alphabetical order (according to authors’ last names, if given). All the sources used in the text of my paper are listed on the bibliography. Each source is correctly written and punctuated. 22 I have also numbered the STEP 17 Evaluate Your Paper Take Time to Evaluate Read your paper one more time. This time use a rubric or checklist to evaluate whether you have exceeded the requirements for the research paper. 23 STEP 18 Presenting Your Research Oral Presentation After you have completed writing and editing your research paper, prepare an oral presentation of your paper. Follow these simple steps as you prepare your oral presentation. State the research paper topic. Tell why you chose this topic. State the thesis statement or purpose of the research paper. Give a brief account of the entire paper. What conclusion(s) did you reach after completing this research? Has this research encouraged or sparked an interest to continue further investigation of your topic? Do not read your paper as your presentation; instead, rely on your prepared notes. Keep your audience in mind by using eye contact throughout your presentation. Answer any questions that your classmates may have if your teacher allows the time. Recognize any key sources that were helpful in writing your paper. Stay within your time limit (two to five minutes); practice with a recorder or with a friend. Use audio-visuals (posters, pictures, videos, charts, graphs, recordings) to enhance your oral presentation. Describe the most interesting part of your research paper. Make suggestions you might offer to a classmate who is about to begin work on a research paper for the first time. 24 STEP 19 Congratulations! Your Paper is Complete! 25 26
© Copyright 2025
