How to Create a Blog with Blogger
Proceedings of the 10th METU ELT Convention
How to Create a Blog with Blogger
Başak Ağın
With the advents in technology, teachers of the twenty-first century have felt the necessity to renew
themselves in order to adapt to the virtual environment, which the young adult learners of today are
quite familiar with. The changing ways of education have also contributed to the need to improve
teaching methods in and outside of the classroom. This paper aims to cover the basics of how to
create a weblog, or blog as it is generally referred to, which could be used for various educational
purposes (e.g. giving feedback to written assignments, providing extra listening practice material
for the learners, or simply communicating with the learners outside the class). Since this was a
hands-on presentation, illustrations constitute a significant percentage of the paper.
The Baby Steps
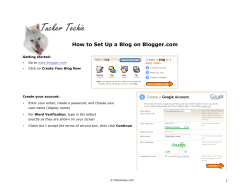
Go to http://www.blogger.com
Figure 1
Create your account by clicking on the “Create your blog now” button, colored in orange.
Figure 2
Sign into your account.
Proceedings of the 10th METU ELT Convention
Figure 3
Choose a blog title (this name will appear on the header of your blog page) and a domain name (this
is going to be the web address that others will type to see your blog). You can always change these
names later; however, changing especially your domain name is not recommended, as your readers
may not be able to find your blog if you do not inform them about this change.
Figure 4
Choose a template for your blog (you may change your template later if you want).
Figure 5
Write your first entry. The “Posting” tab will open automatically at this step. Later, whenever you
want to post an entry, you may use this tab. Do not forget to add a title, which may serve as your
permalink (permanent link; by clicking on the title you will be able to see your post as a single page
on the web) in many templates. Publish your post. Now, your blog is complete.
Proceedings of the 10th METU ELT Convention
Figure 6
A Few More Details
Adding Pictures, Audio and Video Files
By clicking on the “Picture” icon, you can add a picture from your computer or from the web. By
clicking on the “Video” icon, you can add a video from your computer.
Figure 7
If you would like to upload audio or video files from the web, then you should copy and paste the
“embed” code of the relevant file in the “Edit HTML” tab. Unless protected, these codes are often
available on the websites that provide audio / video sharing options underneath the files you would
like to publish.
How to Add Color and Hyperlinks
Select the text that you would like to color, or turn into a hyperlink with your mouse or using
SHIFT + LEFT / RIGHT ARROW
Click on the “color” icon and choose the color you want / Click on the “hyperlink” icon and insert
the link you would like to give into the dialog box (without the http:// part).
Proceedings of the 10th METU ELT Convention
Figure 8
How to Moderate Comments
You may need to moderate comments since there might be spam comments, or you may wish to
control your learners’ comments. You can find the comment moderation setting on the “Settings |
Comments” tab. If you activate “comment moderation”, you will come across comments awaiting
moderation on your dashboard.
Figure 9
You can also moderate comments through email if you enter a notification address. This does not
change your settings and it is optional. In other words, you can always moderate comments on the
Blogger interface.
Layout
Blogger’s layout options are easy to use and will let you arrange items on your page without
requiring a knowledge of HTML or CSS, through the Layout | Page Elements tab.
Figure 10
By clicking on the element you want to move and by dragging and dropping the item where you
want it to be, you can customize the layout of your blog.
Proceedings of the 10th METU ELT Convention
Figure 11
You can also add new elements by clicking on the “Add a Page Element” link. This will open a
pop-up window.
Figure 12
Getting Your Learners Involved
In order to involve your learners in the class-blog project, it is best to hold a session to get them
familiarized with the basics of blogging. You may need to publish a “blog manifest” to set your
rules; or still better, you may decide on the rules together during your blog session. However,
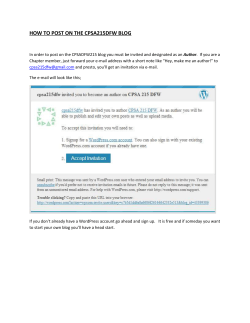
before this, they need to be invited to become a member of the blog. As the person who has started
this specific blog, you have automatically become an administrator. Your learners, when they
accept your invitation, however, will become authors only. If you would like to do so, you may
assign some of them as administrators later.
Figure 13
Under the “Permissions” tab, you will find the “Add authors” link below your user name. Click here
and enter the email address of the person you would like to invite in the dialog box that appears. If
the invitee does not have a Google account, Blogger will direct him/her to associate the email
address with Google accounts.
When the invitation is accepted, log in to your account and go to the same tab again. You will see
the invitee has become an author.
Proceedings of the 10th METU ELT Convention
Figure 14
From now on, the other authors you have invited may contribute to your class blog by posting
entries, adding audio / video files, or pictures. They may comment on posts, too. However, they will
not be able to change the layout, moderate comments, or modify what other authors have published.
Only the person who has the administrator privilege will be able to do these.
Born in Ankara in 1980, Başak Ağın (agin@metu.edu.tr) holds a BA in English Language and
Literature, and an MA in British Cultural Studies. She worked for Turkish Land Forces Command
(2003-2006) and Ankara University, TÖMER (2006-2008) before she joined METU, DBE as an
instructor. She lectured at Ankara University, DTCF, for one semester (2007-08 Spring) and took
part in the LANCELOT project as an online teacher trainer. Her fields on interest are CALL and
medical translation.
© Copyright 2025


