Windows XP Pinellas Enterprise Wireless How-to for
Wireless How-to for
Windows XP Pinellas Enterprise
The following procedure is a one-time configuration. This process will install a client certificate on your
computer and auto-configure your wireless profile.
Important! BTS must know your wireless network adapters’ MAC address for a successful connection.
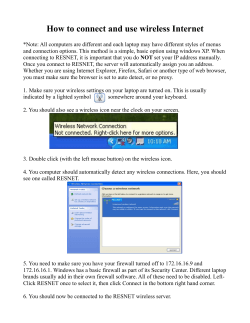
1. Click the wireless icon on your taskbar. (figure1)
a. Alternatively you can click the Start Button > Settings > Control Panel > Network
Connections. Right-click the “Wireless Network Connection” icon and select “View
Available Wireless Networks”.
Figure 1
2. Click on “Change advanced settings” located on the left side of the window. (figure 2)
Figure 2
3. Click on the center tab “Wireless Networks”. (Figure 3)
4. Click the Add… button in the “Preferred networks” section of the window. (Figure 3)
Figure 3
5. From the “Association” tab, enter Pinellas_Enterprise (case sensitive and include underscore) in
the “Network name (SSID)” field. (Figure 4)
6. Under the “Wireless network key” section make sure to select WPA2 and AES. (Figure 4)
Figure 4
7. From the “Authentication” tab, select Protected EAP (PEAP). (figure 5)
8. Uncheck the checkbox “Authenticate as computer…” (figure 5)
9. Click the “Properties” button. (figure 5)
Figure 5
10. Uncheck the checkbox for “Validate server certificate”. (figure 6)
11. Click the “Configure…” button. (figure 6)
Figure 6
12. Make sure that the checkbox is checked. (This will be the case for most users)
a. If your laptop is not joined to an Active Directory domain you will need to uncheck the
checkbox. Click the “OK” button. (figure 7)
Figure 7
13. Click the “OK” button on each window to close and save the configuration.
14. You will now need to connect to the Pinellas_Enterprise wireless network by clicking the
wireless icon on you taskbar. (figure 8)
Figure 8
15. Click the Pinellas_Enterprise SSID and then click the “Connect” button. (figure 9)
Figure 9
16. You may see a balloon popup (figure 10), which when clicked will open the Enter Credentials
dialog.
17. Enter your username and password. The Logon domain will usually not be necessary. (figure 11)
Figure 10
Figure 11
18. You will see a connecting window which will show “Connected!” when complete. (figures 12 and
13)
Figure 12
Figure 13
You’re not fully connected yet. Please continue. The installation of a certificate
and reconfiguration of the wireless settings is required.
19. Now launch Internet Explorer and browse to any website. You will be redirected to the following
dialog. (figure 14)
Figure 14
20. You will see your Device ID (MAC address) pre-populated. (figure 15)
21. Enter your user ID and a simple description of the device you are connecting with. (figure 15)
22. Click the Register button. (figure 15)
Figure 15
23. Click start once the Network Setup Assistant appears. (figure 16)
Figure 16
24. Say Yes to the installation of any certificates. (figure 17)
Figure 17
25. You may now click exit. (figure 18)
Figure 18
26. You may close the Internet Explorer window below. (figure 19)
Figure 19
Let’s verify the wireless configuration is correct.
27. Click the wireless icon on your taskbar. (figure 20)
a. Alternatively you can click the Start Button > Settings > Control Panel > Network
Connections. Right-click the “Wireless Network Connection” icon and select “View
Available Wireless Networks”.
Figure 20
28. Click on “Change advanced settings” located on the left side of the window. (figure 21)
Figure 21
29. Click on the center tab “Wireless Networks”. (figure 22)
30. Select the Pinellas_Enterprise and click the “Properties” button in the “Preferred networks”
section of the window. (figure 22)
Figure 22
31. From the “Association” tab, verify the following.
Figure 23
32. Verify the following are now configured.
33. Click the “Properties” button. (figure 24)
Figure 24
34. Verify the following is correctly configured. (figure 25)
Figure 25
35. Click the “OK” button until you exit out of any open windows.
36. You may now connect to the Pinellas_Enterprise wireless network.
Figure 25
If you cannot connect please try restarting your laptop.
If any issue should occur please contact the Customer Service Center for
assistance.
© Copyright 2025

![[WCR-300S] How to Change the Wireless Network Name(SSID)](http://cdn1.abcdocz.com/store/data/000232989_1-c13ffbaf9a88e423608ef46454e68925-250x500.png)


