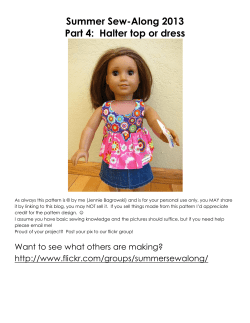
Hankie Couture Square Neck Bodice Dress By Marsha Greenberg •
Hankie Couture
Square Neck Bodice Dress
By Marsha Greenberg
• Seams are 1/4 inch.
• Use 100% cotton for lining (batiste
makes a good lining because it is very
lightweight).
• Dress can be sewn by hand or machine.
www.SewBeautifulmag.com
1
CUTTING
• Pattern piece provided covers
front and back bodice. Arrange
on handkerchief in such a way as
to center a print or embroidery.
Keep in mind ways to use
corners and edges as overlays
[see page 44, 50, 57, 64, 66,
104, and 121 in book (Hankie
Couture: Handcrafted Fashions
from Vintage Handkerchiefs,
Runing Press, 2011) for ideas].
Cut one from handkerchief and
one from lining.
• Cut a rectangle for the skirt
using the decorative edge of
the handkerchief as the hem.
Determine height of skirt by
measuring doll from waist to
desired finished dress length.
Allow 1/4 inch for waist seam.
3. Stitch strap ends to lining on
inside back. Place end of strap 1/4
inch below top edge of bodice and
7/8 inch from back edges. Hand
stitch in place (fig. 3).
Figure 3
6. Place center back seam right
sides together and stitch from
bottom of skir t stopping
approximately 4 to 4-1/2 inches
from top of dress (fig. 6).
Figure 6
1/4”
7/8”
4. Mark center of skirt rectangle
and run gathering stitches in
top raw edge (fig. 4).
Figure 4
INSTRUCTIONS
1. Stitch darts on bodice front as
indicated on pattern piece. Press
darts toward center. Repeat for
lining (fig. 1).
Figure 1
5. Gather skirt to fit width of
bodice and pin to bodice with
right sides together. Distribute
gathers evenly and stitch waist
seam. Press seam toward bodice
(fig. 5).
Figure 5
7. Try the dress on the doll to mark
snap placement. Stitch snaps to
back opening at waist and top of
bodice (fig. 7). –SB
2. Pin lining to bodice with right
sides together. Stitch back,
armhole, and neck edges,
pivoting at dots indicated on
pattern (leave bottom waist edge
open). Clip seam allowance in
corners of neck as shown (fig. 2).
Figure 2
2
Sew Beautiful July/August 2011
Figure 7
www.SewBeautifulmag.com
3
© Copyright 2025


