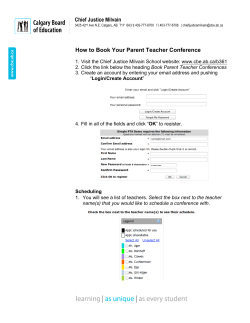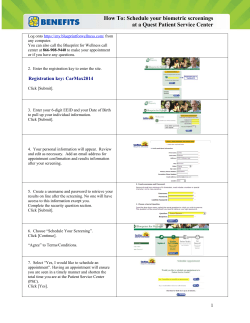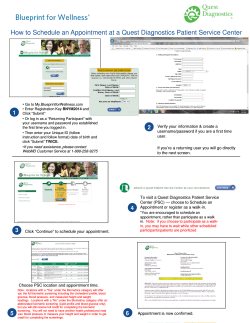
LMS Intellibound, Inc. Managed Receiving Vendor/Carrier User Manual
LMS Intellibound, Inc.
Managed Receiving
Vendor/Carrier User Manual
1/6/2010 v 5
1
APPOINTMENT
SCHEDULING PROCESS FOR
VENDORS AND CARRIERS
1/6/2010 v 5
2
Table of Contents
APPOINTMENT SCHEDULING PROCESS FOR VENDORS AND CARRIERS .........................2
CONTACT INFORMATION ................................................................................................................................................ 4
PROVIDER REGISTRATION.............................................................................................................................................. 6
MULTIPLE CLIENT ACCESS............................................................................................................................................. 8
CARRIER SELECTION ...................................................................................................................................................... 10
DATE SELECTION.............................................................................................................................................................. 11
TIME SLOT SELECTION .................................................................................................................................................. 12
SCHEDULE APPOINTMENTS .......................................................................................................................................... 13
APPOINTMENT LIST ......................................................................................................................................................... 16
1.
How do I print my gate pass when an appointment has already been made?........................................................ 19
2.
I get an error message that says “Too many pallets for door” or “Not enough pallets for door”. ....................... 19
3.
When I try to print my Gate Pass, I get a blank page. ............................................................................................. 19
4.
I can’t find a time slot for my appointment............................................................................................................... 19
5.
I receive a message stating that “one or more of the orders is outside the due date range. .................................. 19
6.
How do I change my “appointment list” date range?............................................................................................... 20
7.
It takes too long to scroll through all my appointments to get to the appointment that I’m looking for. How do
I speed up the process? ......................................................................................................................................................... 20
8.
How can I see all possible available time slots for my appointment without having to click “Find Slot” for every
15 minute intervals? .............................................................................................................................................................. 20
9.
What is the procedure for notifying the delivery distribution center of a late arrival or missed appointment?. 20
GLOSSARY OF TERMS ............................................................................................................22
1/6/2010 v 5
3
CONTACT INFORMATION
Managed Receiving Support
Ann Hoff, Scheduling Coordinator
MgdRecSupport@lmsintellibound.com or
ahoff@lmsintellibound.com
770-724-0524
Monday – Friday
8:00 am – 5:00 pm ET
1/6/2010 v 5
4
APPOINTMENT SCHEDULING PROCESS
¾ SCHEDULING AN APPOINTMENT
O PROVIDER REGISTRATION
O CREATING A NEW APPOINTMENT
O MULTIPLE CLIENT ACCESS
O CARRIER SELECTION
O DATE SELECTION
O TIME SLOT SELECTION
O SCHEDULE APPOINTMENT
O DRILL DOWN
O APPOINTMENT CONFIRMATION
O GATE PASS
¾ APPOINTMENT LIST
¾ EDITING/UPDATING AN APPOINTMENT
1/6/2010 v 5
5
PROVIDER REGISTRATION
In order to begin using Managed Receiving, each user must first register. Prospective
users should go to:
¾ www.lmsintellibound.com/managedreceiving to obtain the Provider Registration
Form
¾ Applicants should allow 24 hours for registration approval and receipt of an
“Authentication” letter, containing their User ID, Password and User Guide, via email.
1/6/2010 v 5
6
CREATING A NEW APPOINTMENT
¾ As a Vendor/Carrier user, you will have access to the green “Appointments” tab.
¾ From the user’s “Appointment List” display, click on the green “Plus” sign to create
a new appointment.
1/6/2010 v 5
7
MULTIPLE CLIENT ACCESS
Effective late January to early February 2010, vendors/carriers
will have capability to schedule appointments for multiple clients.
To begin appointing for a subscribing client, click the drop down
box and select the desired client and location that you wish to
create a delivery appointment.
1/6/2010 v 5
8
CREATING A NEW APPOINTMENT (cont’d)
The appointment scheduling process consists of nine (9) simple steps:
¾ Step 1: From the “Schedule Appointment” screen displayed below, enter the
Purchase Order Number in the box to the left of “Find Order”.
¾ Step 2: Click on “Find Order.” Purchase order number “330442” is listed below as
an example.
¾ To add additional purchase order(s) to a load, enter the PO number in the box to the
left of “Find Order” and then click “Find Order”.
NOTE: Please add all purchase orders delivering with this appointment. Failure to do so
may create delay for drivers at the delivery location or force a rescheduling of the
appointment.
1/6/2010 v 5
9
CARRIER SELECTION
¾ Step 3: In the “carrier” box, enter the first few letters of the carrier name and a
drop down list pops up with carriers meeting your selection. Note: This applies to
vendors only. Carriers are defaulted to the user’s company name.
¾ Step 4: Click on the appropriate carrier from the list.
1/6/2010 v 5
10
DATE SELECTION
¾ Step 5: Appointment date defaults to the primary due date. Another appointment
date may be selected from the drop down menu.
¾ Appointment dates are based upon predetermined appointment and vendor rules.
Generally, vendors /carriers may schedule an appointment online for the due date
of the primary vendor. (See Glossary for definition of Primary Vendor).
¾ Step 6: Select preferred appointment time from the drop down list and click “Find
Slot.”
1/6/2010 v 5
11
TIME SLOT SELECTION
¾ Step 7: After clicking “Find Slot”, the optimal available time slot appears.
¾ For alternate time slots, click on the “blue drop down arrow”. Alternate
doors and time slots will be shown and you may click on an acceptable slot.
¾ If you receive a message regarding pallets not meeting the minimum or
maximum for the door, click on the “blue drop down arrow” and select an
alternate door that complies with the min/max requirement. Next, click
“Schedule Appointment”. NOTE: Do not click “Find Slot” again.
¾ If unable to obtain an acceptable slot after one (1) or two (2) attempts:
¾ Click on the person icon in the upper right of the screen
¾ Submit the email to Support with your request.
¾ Include purchase order numbers in the subject line and delivery date
requested for the appointment in the message box.
1/6/2010 v 5
12
SCHEDULE APPOINTMENTS
¾ Step 8: “Schedule Appointment” button to lock down appointment slot. Note: No
appointment is made until the “schedule appointment” button is clicked and an
appointment confirmation number is provided.
1/6/2010 v 5
13
CONFIRMATION NUMBER
AND GATE PASS
¾ Step 9: After clicking “Schedule Appointment”, the appointment confirmation
number (027-48428) is assigned.
¾ Review the appointment information. The “Gate Pass” may be printed from
this page by clicking the green outlined box with barcode labeled “Print Gate
Pass.”
¾ If you see an issue, you may edit the appointment by clicking on the
confirmation number. Enter the desired changes and click “Update
Appointment”.
¾ You may schedule another appointment by clicking “Add another
Appointment” or return to the “Appointment List”.
1/6/2010 v 5
14
THE GATE PASS (cont’d)
¾ The “Gate Pass” allows the user to verify delivery information including date, time,
purchase order number(s), vendor(s) and estimated unloading cost. It should be
printed and retained.
¾ The driver should be provided the confirmation number.
¾ It is not necessary to provide the driver with a hard copy of the “Gate Pass”.
¾ The confirmation number should be presented to the Guard when checking in at the
distribution center guard shack.
1/6/2010 v 5
15
APPOINTMENT LIST
¾ To review/update an appointment, click on the appointment number and make
necessary changes. Be sure to click “Update Appointment” to effect your
change(s).
¾ To adjust date parameters for the “Appointment List”, click on the right or left
“gold arrow” to advance forward or backward, depending on your date range
setting.
1/6/2010 v 5
16
EDIT APPOINTMENT
(cont’d)
(Also referred to as “Update Appointment”)
From the “Update Appointment” screen, the user can change the carrier, change the
delivery date and time, or add/delete purchase orders to the load.
¾ Change Carrier: click on the “Carrier box”, type the first few letters of the
replacement carrier, and select desired carrier from the drop down list.
¾ Add Purchase Order: enter the order number in the box beside “Find Order”.
Click “Find Order”.
¾ Delete a Purchase Order: click on the minus sign in the left margin beside the
desired purchase order number to be deleted. This only deletes/removes a purchase
order from the appointment only.
¾ Change Delivery Date/Time: select desired date/time from the drop down box
and then press “Find Slot”.
¾ To accept changes, click “Update Appointment” at bottom of screen or “Cancel”
to reject changes.
NOTE: Depending on changes, door and or time slot may also change.
1/6/2010 v 5
17
FREQUENTLY ASKED
QUESTIONS (FAQs)
1/6/2010 v. 5
18
FREQUENTLY ASKED
QUESTIONS (FAQs)
1. How do I print my gate pass when an appointment has already been made?
¾ Go to the appointment list (first screen that appears when you log on). Scroll down and look for
your primary vendor, due date and open status.
¾ Click on the appointment number (site #-#####).
¾ From the “Update Appointment” screen, click on the “Print Gate Pass” box outlined in green
with a barcode in the middle located on the right side of the page.
¾ Gate pass will print in Adobe Acrobat. Verify your delivery information and print your gate pass.
2. I get an error message that says “Too many pallets for door” or “Not enough
pallets for door”.
¾ Click on the down arrow beside the door number. You will be given a list of alternate doors and
timeslots.
¾ Select an alternate door/slot.
¾ If you continue to receive the message, click on the person icon in the upper right of the screen
and complete the email template including your PO # in the subject line and a brief description of
the difficulty and desired result.
3. When I try to print my Gate Pass, I get a blank page.
¾
The version of Adobe Acrobat on your PC is not the current version.
¾ Go to www.Adobe.com and download the latest version of Adobe Acrobat. This is a free download.
4. I can’t find a time slot for my appointment.
¾ Click on the person icon in the upper right of the screen and complete and send the email template,
making sure to include your purchase order number in the subject line.
¾ Provide a brief message of what you are trying to do and an ETA of your truck in the text box
¾ Press send. This is much a faster alternative than contacting support via telephone.
5. I receive a message stating that “one or more of the orders is outside the due
date range.
¾ Online scheduling is only available for appointments that are within the due date parameters.
¾ Requested deliveries more than one (1) day from a due date require a due date change from the
buyer.
¾ Requested deliveries after the due date, do not require a due date change, but can only be made by
support.
¾ Click on the person icon and complete the email template, stating that you need an appointment
outside the due date parameters. Provide the date and ETA you are requesting for a delivery
appointment.
1/6/2010 v. 5
19
6. How do I change my “appointment list” date range?
¾ To change the range to “This Month”, “This Week,” “Next Week”, “This Year”, etc. Click on the
Grey Gear located to the right of the Green Plus sign.
¾ Go down the Parameter column until you reach “Date Range”.
¾ Go directly across to the value column and click on the current range.
¾ Click on the drop down arrow and select the range you would like for your display.
¾ Click submit.
¾ Click Save changes to: and select “Current User”. Selecting “Current Session” will retain
your settings for “current session” only and your settings will revert to your previous settings
when you log off.
¾ Click save. Your dash board will now reflect you new date range.
7. It takes too long to scroll through all my appointments to get to the
appointment that I’m looking for. How do I speed up the process?
¾ Sort any of the columns both ascending and descending by clicking on the column heading. For
instance, click on the status column once and all gated out appointments are on top. Click again,
and all open appointments appear at the top.
¾ Change your “Appointment List Display” range to a shorter time period by following the steps in
FAQ 6 above.
8. How can I see all possible available time slots for my appointment without
having to click “Find Slot” for every 15 minute intervals?
¾ Select your preferred delivery time and click “Find Slot”.
¾ After processing, the system will display the optimum time slot for the purchase order parameters.
¾ If the displayed time slot is not satisfactory, click on the down arrow located to the right of the
displayed door number and time.
¾ A maximum of 10 alternate time slots will be displayed.
¾ Select any of these by clicking on the slot and then clicking “Schedule Order” if new appointment,
or “Update Appointment” if you are editing an existing appointment.
¾ If none of the slots are acceptable, click the person icon in the upper right corner of the screen.
Complete the email template, including the purchase order number(s) in the subject line and type a
brief message defining your request.
¾ Press “Send”.
¾ Your request will be handled and you will receive a reply via email once processed.
9. What is the procedure for notifying the delivery distribution center of a late
arrival or missed appointment?
¾ Log on to managed receiving and click on the person icon in the upper right hand corner.
¾ Enter the PO # or the Appointment confirmation number and “late truck” in the subject line. In
the message box, include the reason that the truck will be late, current status and location and
estimated time of arrival. Click “Send”.
1/6/2010 v 5
20
¾ The coordinator will notify the appropriate personnel and a decision will be made regarding the
appointment status. The user making the request will be notified as soon as possible regarding
the revised schedule.
¾ You will be notified by return email of the decision and any conditions associated with the work in
or reschedule.
¾ Should it be necessary to reschedule your appointment, the next available slot will be secured and
you will need to log on and print your revised gate pass.
1/6/2010 v 5
21
GLOSSARY OF TERMS
Average Unload Time: the average time required to unload per pallet (in minutes).
Cancelled: a request to cancel the appointment only has been submitted by the
Vendor/Carrier. This does not affect the status of the purchase order.
Confirmation Number: The appointment number. A unique number assigned to each
appointment.
Door Count: the number of doors required to unload a shipment. Multiple doors are used
for loads that require large breakdowns.
Drop Load: a load or vendor that has been preapproved to have the trailer dropped on the
yard and unloaded at a later time. Vendors/carriers may refer to this as drop and hook
(drop their loaded trailer and pickup one of their empty trailers) as opposed to “Live
Unload”.
Gate In: time the truck is allowed in the gate and put to a door for unloading.
Gate Out: time truck is released from the dock and cleared to leave the premises.
Gate Pass: the document that contains all the appointment information including
appointment confirmation number, appointment date, time, and door, purchase orders,
vendors, and estimated unloading, etc.
Live Unload: Truck is assigned a specific unload time and door for unloading and truck
remains hooked to trailer. Trailer is not dropped.
Maximum Load Count: the maximum number of loads that can be scheduled for a given
due date for a vendor.
Minimum/Maximum Pallet Count: Freight flow is controlled by the use of minimum
and maximum pallet counts. This allows designation of certain doors to be utilized as
“Speed” or “Express” doors and others to be utilized as “Large Volume” doors.
On Complex: time the driver arrives on the premises and checks in with the gate
attendant.
1/6/2010 v 5
22
Open: appointment has been made but truck has not arrived and checked in with gate
attendant yet.
Primary Vendor/Due Date: “Primary Vendor” is the vendor with the greatest number
of pallets on a multi-vendor appointment. The due date defaults to the “Primary Vendor”
purchase order due date.
Warehouse Pallets: the number of pallets that the vendor/truck pallets will be broken
down to.
1/6/2010 v 5
23
© Copyright 2025
