IPS e.max Meso inCoris ZI Meso
Advantages
•
•
•
•
•
•
No outside lab fee
Minimal chair time
Quick turn around time
Esthetic and functional control
Patient acceptance
Delegable to auxiliary staff
Techniques
•
•
•
•
•
•
Direct scan of stock or custom abutment
Abutment level impression (Snappy)
Bench-top image of fixture-level impression
Scanbody image with Connect (Live or model)
Scanbody image with InLab
Scanbody/ScanPost image with Chairside 4.2!
Chairside Choices
Hybrid Abutment
Hybrid Abutment Crown
Chairside Material Choices
IPS e.max Meso
inCoris ZI Meso
Chairside Abutment
• One-time use TiBase Kit specific to your
implant (includes Bluecam Scanbody and
screw)
• Scanpost (optional)
• Gray Scanbody if using Omnicam
• e.max meso block OR inCoris TZ meso block
OR a lab to process your abutment file
• CAD block of your choice for crown
Scanbody Types
Intraoral Scans
• Gingiva Mask
• Restoration arch
• Opposing Arch
• Buccal Bite
Omnicam Scanpost
Model Phase
• Buccal Bite Registration as usual
• Set Model Axis (new in 4.2)
Scale Tool
Sprue Removal
Fit Check
Ceramic Processing
• Polish then Crystallize
• Stain/Glaze Combination Firing
• Crystallize then 2nd Fire Characterization
New Firing Pin
Note the Firing Differences
Completed Ceramic Structures
Bonding e.max to TiBase
Delivery
•
•
•
•
•
•
No different than what you do now
Try in abutment with PA for verification
Torque to implant brand requirement
Block out screw access
Try in crown, adjust as needed
Cement crown with SpeedCEM or similar
Most Common Errors
•
•
•
•
Incorrect implant designation
Incorrect scanbody type selection
Incomplete seating of scanbody on TiBase
Tissue margin of abutment below level of
TiBase
• Incorrect model axis
• Incorrect parameters
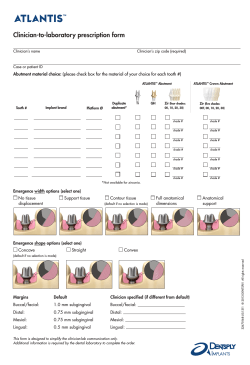
PARAMETERS
Anatomic Abutment Crown
Abutment
Abutment Veneering Crown
Implant #8 with Custom Healing
Abutment
All Scans Taken Intraorally
e.max HT A2 on F0 inCoris Meso
#30 & #31 NB Active 5.0 w/ Contour
Healers
Healing Abutments Removed
Abutments
e.max LT C2
Questions?
drfernandez@drfernandezdds.hrcoxmail.com
497-4825
© Copyright 2025


