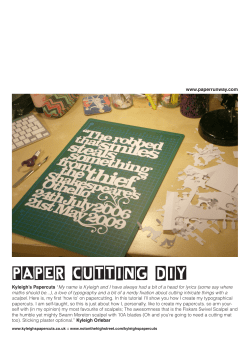
Traditional Paper Cutting
Traditional Paper Cutting
written by Katie Fowers
Objective:
1. Students will learn about different types of paper cutting and the countries where they
originated.
2. Students will practice basic paper folding and cutting techniques to create a paper cut of their
own design.
3. Students will learn about different cultures and peoples.
State Core Links:
1. Standard 4, Objective
and diversities
2. Standard 4, Objective
places.
3. Standard 6, Objective
4. Standard 1, Objective
1: Compare the arts of different cultures to explore their similarities
2: Connect various kinds of art with particular cultures, times, or
1(social studies): Examine maps and globes.
3: Handle art materials in a safe and responsible manner.
Grade Level: K-12: This lesson plan can be adjusted in complexity to be taught at any grade level.
Materials: these are the materials needed for ALL of the activities in this lesson plan. You can
adjust what supplies will be needed if you choose to do only one of the activities.
Scissors
Awl or exact-o knife (optional)
Red Paper (construction or print)
Scratch paper
White Paper
newspaper
Tissue paper
String
Watercolor paints
Scotch tape
Introduction:
Paper cutting has been around for many centuries and is a type of folk art that has remained popular
throughout time. Started in China over 2000 years ago, paper cutting has spread around the world and
different countries and cultures have adapted and changed it according to their traditions. Because
the materials and supplies for this type of art are fairly inexpensive, many people of different
economic status have been able to experiment with this art form. Paper cutting can be tailored for
all ranges of skill from beginners to experts. Some of the most basic paper cutting can be shapes that
only take minutes to create while other artists work for hundreds of hours to create complex and
very detailed scenes.
Overview:
Chinese paper cutting called hua yang (pronounced ) is the earliest type of paper cutting. This type
of Folk art native to China came closely on the heels of the invention of paper in China during the
Han Dynasty (206 BC – 220 AD). For the most part, the cuts are made with scissors, although more
intricate and complicated designs use engraving knives as well. Traditionally, Chinese paper cuts
were most often made from red paper because the Chinese saw red as a lucky color. These paper cuts
are used celebrations, festivals and decorations. In Chinese these paper-cuts are also known as
"window flowers" because they are sometimes hung on windows. Other uses include being pasted
directly onto walls or doors, or attached to numerous smaller objects, where they served as ornaments
or good luck charms. Chinese paper-cuts usually represent everyday life. Common subjects for
the folk art
form include the dragon, phoenix, signs of the zodiac, birds, trees, flowering branches, bamboo,
peonies and other flowers, horses, fish, cats and kittens, landscapes, insects, pagodas, characters
from traditional folktales, and traditional Chinese masks. The designs might be serious, stylized,
or even whimsical, and appear in a variety of sizes and shapes, including rectangular, diamond,
and oval.
Scherenshnitte (pronounced: shair-en-shnit-teh), which literally means “scissors-cutting”, originated
in Switzerland and Germany during the 1500’s and became a very popular folk art in the 1800’s.
Scherenshnitte was originally used to decorate birth and marriage certificates as well as to be used as
Christmas decorations. This type of paper cutting usually has a symmetrical design or picture. This
is most easily achieved by folding the paper multiple times and cutting a design so that it is
symmetric (ex: making paper snowflakes…). Themes often included bible stories or figures. Today,
however, you can use almost any shape or object in design. Traditional scherenshnitte artists would
cut away directly at the paper freehand (without drawing out a design before hand) and often used
watercolor paints to decorate their paper cuttings. After the cut was complete, artists would often
use fancy handwriting to add words or phrases to the scherenshnitte.
Papel Picado (pronounced: pah-PELL pee-CAH-doe) which translated means “perforated or
punched paper” is the Mexican form of paper cutting. Historically, the Aztecs used the bark of wild
mulberry and fig trees to make a rough paper called amatl. Amatl was used to make flags and banners
to decorate temples, streets and homes. Nowadays, these elaborate and colorful designs are
commonly cut from tissue paper using a guide and small chisels, sometimes cutting up to fifty sheets
at a time. The sheets are then hung up on a piece of string, much like a banner or a string of flags.
Popular papel picado themes include birds, floral designs, angels, skeletons, historical figures and
words. However, themes change depending on what they are being displayed for. Most often you will
see them around Easter, Christmas and the Day of the Dead, as well as during weddings and
christenings.
In Class Discussion:
For the in-class discussion, you will want to help the class locate the countries (or country) on a map
of the world. Display some examples of the types of paper cutting. Discuss the issues of positive vs.
negative space in the paper. Talk about how you can make a design using either positive or negative
space (most students will find it easiest to use a positive space paper cut). Follow up with a discussion
of questions about the types of paper cutting. Some suggestions for questions may include:
1. Think about the themes used in Chinese paper cutting. What pictures would you use for your
2. Why would somebody making Papel Picado want to cut multiple sheets at a time? Is there
another reason besides just saving time?
3. What visual effect does using tissue paper have vs. using regular construction paper? Does
light make a difference when displaying tissue paper?
Activities:
Each of these activities is for a different type of paper cutting. You can adjust the difficulty for each
of these activities by changing the types of designs and the complexity of the cutting. For the most
part, these activities are geared for grades 3-6.
Activity 1: Hua Yang
1.
2.
3.
4.
5.
6.
7.
Give each student a piece of scratch paper. Have them draw their own picture or design they
will want to have on their paper cut.
Have them think about positive and negative space. Also, try to have the picture or design
be one continuous shape (this may be tricky for younger kids).
These pictures and shapes do not need to be symmetrical.
Have them trace their picture onto a red piece of paper.
Have them shade in with pencil the shapes of negative space that they are going to cut out.
Use scissors and/or exact-o knifes (for older students) to cut out the picture.
Use scotch tape to tape them to the windows or walls in the school.
Activity 2: Scherenshnitte
1. Give each student a couple of pieces of newspaper cut into squares. This will be used for
practice before the final project.
2. Fold the paper into quarters or eighths.
3. Use the scissors to cut shapes, designs and pictures into the newspaper. Have them unfold the
newspaper to see which shapes they liked, which cuts didn’t work, etc.
4. Give the students the same shape of white paper. Fold it in the same way the newspaper was
folded. Now that they have practiced, this will be the cut for the final project.
5. Again, use the scissors to cut shapes and designs into the paper.
6. Unfold the paper and set it on a scratch piece of paper.
7. Use watercolor paints to paint the cutout.
8. When dry, glue the scherenshnitte onto a piece of sturdy paper.
9. Have the students write in cursive or fancy handwriting a saying or a word that relates to
their artwork.
Activity 3: Papel Picado
1. On a scratch piece of paper, have the students make a design or picture they would like to
have on their paper cut (it may be helpful to have a template of some things like flowers,
sun, skeleton, etc.) Make sure the design is symmetrical!
2. Cut the template out of the scratch paper (remember, you only need half).
3. Have the students choose 2 or 3 different sheets of colored tissue paper.
4. Put the 2 or 3 sheets of tissue paper together and have them fold the tissue in half.
5. Have them trace the design onto the outside of one side on the tissue paper.
6. Use scissors to cut the shapes out of the tissue. Remember not to cut the corners off of
the tissue; you want all of the tissue to remain square/rectangle. It is, however, okay to
trim the sides with zigzags/waves in order to make the edges interesting.
7. Open up your folded tissue paper to reveal your design on all the pieces of tissue.
8. Gather up the class’s papel picado pieces and tape them to a string.
9. Display them in the hall or in the classroom by hanging them from the ceiling.
Sources:
http://www.clevelandart.org/educef/asianodyssey/pdf/MarPapMS.pdf
http://h50034.www5.hp.com/createuse/creative/pdfs/scheren_article.pdf
http://www.crizmac.com/free_resources/papelpicado.cfm
http://www.geocities.com/heartland/valley/8063/scherenschnitte.htm
www.ed.uiuc.edu
© Copyright 2025


